
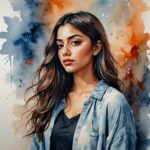

MiniMax H3 Image is now live in Picsart AI Playground, and its big idea is that you can show it what you want instead of only describing it. Drop in up to 16 reference images, add a prompt and get finished visuals in up to 4K, then keep editing them with the same model.
It is the first model MiniMax has made for still images, and it is aimed at everyday image production: product drops, ad campaigns, fashion shoots, room makeovers and design concepts. In all of those jobs, the assets usually exist already. The hard part is turning them into something new.
Below, a look at why a stack of references changes the way a brief comes together, a campaign built with the model from first idea to final export, and the settings worth knowing before you start.
Why a stack of references changes the brief
Describing a look in words is hard. A product's exact shape, a person's features or a specific color grade rarely survive the trip into a prompt, and the result drifts away from what the brief had in mind.
MiniMax H3 Image takes a different route. Each image you add can carry one ingredient of the final picture, whether that is the item for sale, a person, a lighting mood or a location. A portrait can hold the character, an outfit photo the styling and a location shot the scene. The prompt then explains how to put the pieces together.
With room for 16 references in one generation, a single brief can draw on a full shoot's worth of material, and none of it has to start from zero.
One campaign, from mood board to final export
To see how it plays out, follow a small candle brand preparing a winter collection. The team has a clean product photo of each candle, a portrait of the model from last season, a photo of a cozy cabin interior and a still with the soft amber tones the brand loves.
Step 1. Gather the set. Everything goes into AI Playground as references: three candle shots, the portrait, the cabin and the amber still. That fills six of the 16 slots and leaves room to add more later.
Step 2. Explore wide. The first prompt asks for the model holding a lit candle by a frosted window, in the amber tones of the still. The team requests a batch of 10 and gets ten takes on the same idea, a spread of creative directions from one brief.
Step 3. Edit the favorite. One image is close, but the window feels too bright. Instead of starting from scratch, the team uploads that image and asks for an evening sky with snow on the sill. Generation and editing live in the same model, so the fix is one more prompt.
Step 4. Export the final. The approved scene goes out in 4K, in the tall, square and wide shapes the campaign calls for, saved as JPEG, PNG or WebP.
Six existing photos become a full set of campaign visuals without a new shoot. The same approach carries over to a fashion lookbook, where one portrait locks the model's look across new outfits and sets, or to interior staging, where photos of a real room become the base for new furniture, lighting and moods.
References are numbered in the order they are uploaded, so a prompt can point to each one directly as image 1, image 2 and so on. With the candle shots uploaded first, the portrait fourth, the cabin fifth and the amber still sixth, the brief reads as a single prompt:
Winter candle campaign from references
The woman from image 4 standing by a frosted cabin window at dusk, holding the lit amber candle from image 1 close to her face, wearing a cream knit sweater, the cabin interior from image 5 softly blurred behind her, warm amber color grading matched to image 6, gentle candlelight on her skin, snow falling outside, crisp detail on the candle label, no text or logos added
What to put in a reference set
A pile of random images will muddy any brief. Giving every reference a single job keeps the result readable. These are the roles a set usually covers:
| Role | What to upload |
|---|---|
| Product | Product shots and brand references |
| Character | A portrait that shows the face and look to keep |
| Color grade | Any image with the tones and light you want |
| Scene | A room, a street or the setting behind the subject |
| Image to edit | The picture you want changed, plus the change in the prompt |
Each reference needs to be between 128 and 8,192 pixels on a side, in a shape no more extreme than 1:4 or 4:1. JPG, PNG, WebP, HEIC and HEIF files all work, so photos straight from a phone can go in without converting them first.
Sizes, shapes and batch runs
MiniMax H3 Image renders at 1K, 2K or 4K. Aspect ratios run from a tall 1:3 to a wide 3:1, with Auto, 1:1, 4:3, 3:4, 3:2, 2:3, 16:9, 9:16 and 21:9 in between, so a visual can be made in its final shape instead of cropped later.
The resolution levels set the size of the canvas rather than one fixed width. At 4K, a square image comes out at 4096 × 4096 pixels, a 16:9 frame at 5472 × 3072 and a wide 3:1 banner at 7104 × 2368. That is enough detail for print layouts and large website headers.
Prompt enhancement is switched on by default and fills a short prompt out with more detail before the image is made. Image edits always run with it.
Each run returns 1, 2, 4, 6, 8 or 10 images. Asking for a full batch of ten turns a single brief into a set of options to compare side by side, which is where the model earns its place in layout work and campaign planning.
Standard or Highspeed?
Picsart carries two versions of the model. MiniMax H3 Image Highspeed keeps the same limits as the standard model, from 16 references to 4K and batches of up to 10, and returns results faster.
That makes the pair easy to divide up. Highspeed suits quick exploration, when many directions need testing in one session. The standard model is the pick for the final version once the direction is set.
How to try MiniMax H3 Image in Picsart
The model sits in AI Playground on the web and in the desktop app, next to more than 250 other AI models, all under one Picsart account. Developers can also generate with it from the terminal through the Picsart CLI or inside AI assistants through Picsart MCP.
1.
Open the model Go to AI Playground and pick MiniMax H3 Image from the image models.
2.
Add references Upload your references, or leave the slots empty to work from text alone.
3.
Write the prompt Describe the image and say which reference supplies what.
4.
Choose the settings Set the resolution, aspect ratio, number of images and file format.
5.
Generate and refine Generate, choose a favorite and keep editing it until it is ready. They come from the same company but do different jobs. MiniMax H3 and H3 Max make video, while MiniMax H3 Image creates and edits still pictures.
Get answers to common questions
Turn your references into a campaign
MiniMax H3 Image turns the photos you already have into new creative work and keeps editing them in the same place. Gather the photos you already have, open MiniMax H3 Image and let the model put the pieces together.


