Ever wondered how professional photographers get that blurry background effect in their shots? The background blur, or bokeh, is the result of finely tuned camera settings that create the perfect depth of field, isolating the subject of the photo and covering the background with a hazy overlay.
A professionally blurred background is usually achieved with an expensive telephoto lens that closes the distance between the photographer and the subject, or a macro lens that is mostly used for close-up photography. But that’s not the only way. You can also edit your existing photos to create the same effect. All you need is Picsart! And in this article, we’ll show you how to easily blur the backgrounds in your photos.
Why blur photo backgrounds?
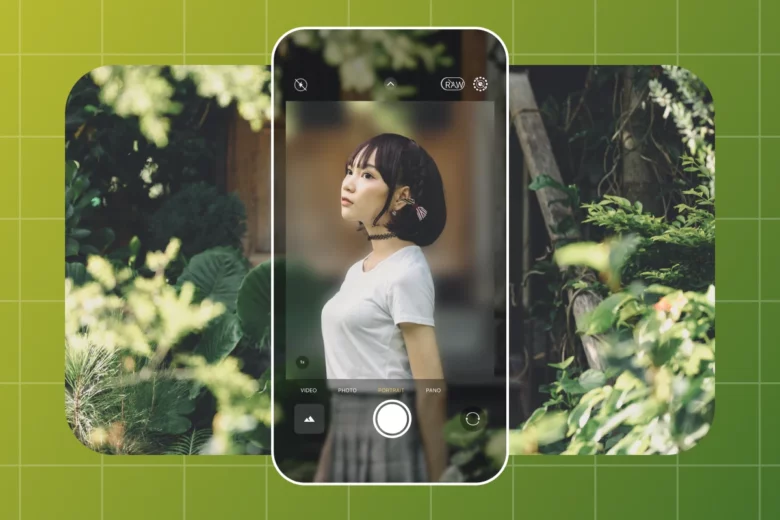
There are many reasons for wanting to blur the background of your photo. If you’re just getting into photography then a blurred background can lend a professional look to your work, it can help the viewer to focus on the subject, cover up a busy background, or add drama and flair to an otherwise basic image. As you can see in the example below, a blurred photo background can add an eye-catching feeling of dimension and movement to your photography.
How to blur the background of a photo in the Camera app
On iPhone
The easiest way to blur the background of your photos is to do it when you’re actually taking the picture. To do that, you need to use the Portrait mode in the Camera app. It’s a very easy process and here’s the walkthrough:
- Open the camera app.
- Above the white shutter button, there’s a horizontal slider where you can select the format of the visual you are capturing. By default, it should be on Photo. Just slide to the left to select the Portrait mode.
- There are lighting modes for Portrait. You can see that above the Portrait there’s another slider that is on Natural Light by default. Just scroll through the options to see which one looks better.
- Now that all the setups are complete, just take a photo and it will have a bokeh blur. You can actually see the blurred background while taking the picture.
The portrait mode in the Camera app is available on iPhones that have more than one camera lens. To be more specific, those models are: iPhone 7+, 8+, iPhone X, and higher.
It’s also possible to adjust the amount of background blur of a photo after it has been taken and it’s quite easy to do. To learn more about this method, just refer to this helpful article from iPhone Photography School (Section 1.2).
However, if you want to blur the background of an existing photo that was not taken using the Portrait mode, jump to the next section of this article to see how you can easily do that using a third-party editor like Picsart.

On Android
Walking through the Portrait mode of Android phones is a bit tricky considering that each manufacturer has their own version of a camera app. But most of Android phones have a very similar interface to iPhone’s Camera app layout, so just look for a Portrait mode in the settings of your camera app. It should be above or below the shutter button. If you’re struggling, refer to this guide that lists the tutorials on how to find the portrait mode on various Androids.
In case your Android phone’s camera doesn’t have the capability of taking Portrait mode photos, don’t worry! Just read the next section to find out how to blur the background of any photo with Picsart.
How to blur the background in Picsart
Using the Picsart Blur tool, you too can create high-quality, professional photos in just a few steps, no matter how experienced (or inexperienced) a photographer you are. Picsart can help you create a blurred background on any of your photos. Follow the steps below to learn how.

On iOS and Android
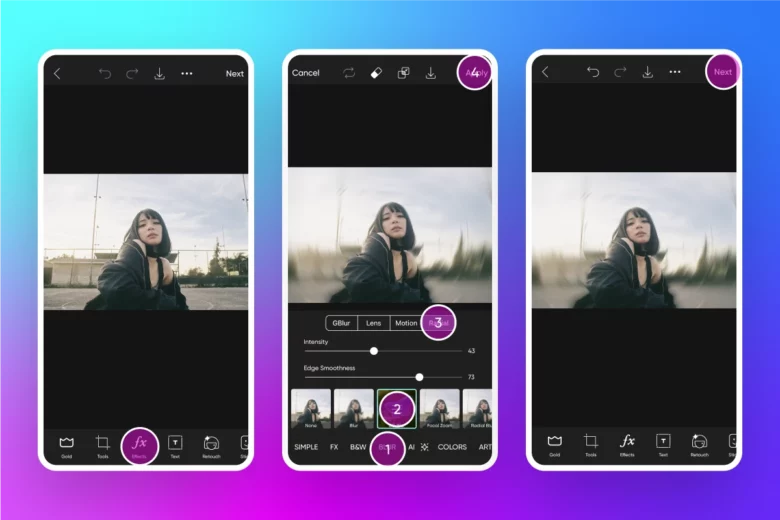
Here’s a quick guide on how to blur the backgrounds in Picsart if you’re using iOS – an iPhone or an iPad, or an Andoird-powered device.
1. Upload your photo
First, pick a photo to get started. To do so, click on the purple + button at the bottom of your screen to open the Create menu. Here you can upload photos from your gallery. On iOS, you can do so by using the square + button that says See All. On Android, just use See All.
2. Go to Effects
Use the Effects button (ƒ𝑥) then go to Blur section.
3. Select the type of blur
In the Blur menu, you’ll see various filters and effects that blur all parts or some parts of your image. Tap on each to try them out and find the one you need.
4. Apply & Export
Once you’re done, use the Apply/Checkmark button on the top right corner. Use the same button again to export your edit. Tap on Save on the bottom left corner. That’s it, you did it!
On Picsart Web Editor
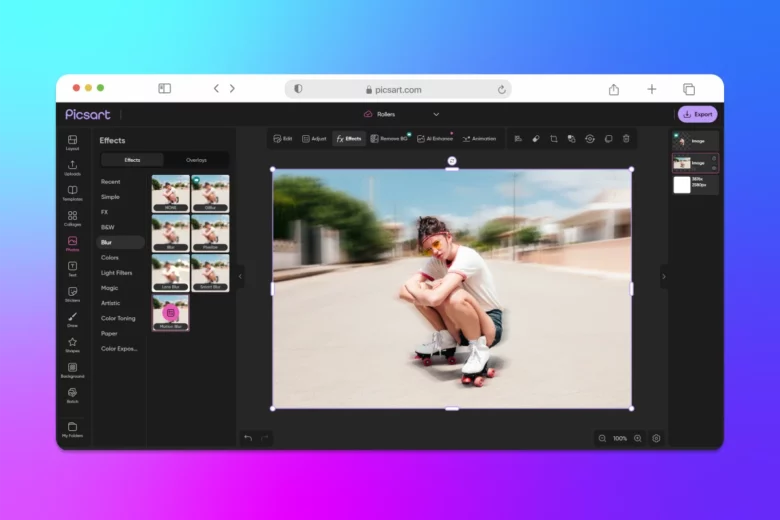
Picsart is also available on the web! Just go to picsart.com and log in to start using Picsart’s Blur effects for backgrounds right from your browser.

1. Start a new project
Click on the +New Project button to upload your image. Use the Uploads button on the left sidebar to upload your photo. Alternatively, you can use the Photos section to access Picsart’s library of stock photography if you want to experiment first.
2. Add blur
Use the ƒ𝑥 Effects button on the top of the editor section. A side menu will pop up on the left side of the screen. Select Blur to see all the relevant effects. Pick the effect you want.
3. Adjust the blur
You can adjust the amount of blur by clicking on the purple button on the effect you’ve selected. You can adjust the strength of the blur by using the Amount slider and playing around with Blend Modes.
4. Download your edit
Use the Export button on the top right corner to save your edit.
How to get the Bokeh effect
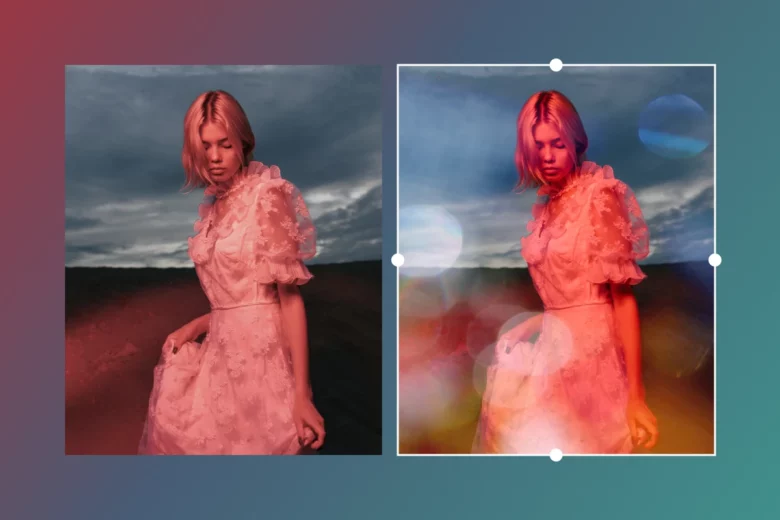
Ever wondered how to give the background of your photos that magical bokeh blur? Bokeh literally translates to ‘blur’ in Japanese. But photographers and photo editors know it as the effect where the lights in the background are softened to create a dreamy, glowing aesthetic.
The bokeh blur effect is ideal for both daytime and nighttime photos. When you apply a bokeh effect to a daytime shot, it creates an ethereal, filtered look. When you apply it to a nighttime shot, it can either soften the noise or make the lights and colors in your background pop for an edgy, futuristic look.

Creating a bokeh background or a bokeh effect with Picsart is super simple.
- Scroll through the editor panel at the bottom of your screen and tap on the Mask icon.
- Find and tap on the Bokeh tool. You’ll find many bokeh effect options, including the standard circular-shaped bokeh blurs plus a variety of different shapes and effects, such as hearts and motion blurs.
- Once you select the effect you want, you can keep customizing your bokeh by selecting where it goes, its opacity (or how intense it is), and its hue, which changes the color of the photo.
There you have it. Now you know how to blur the background of a picture in several easy steps. Hopefully, these tips will help you achieve the professional-looking photos you always wanted. And you don’t have to stop there. There are all kinds of fun edits you can apply and ways to change the backgrounds of your images, so feel free to experiment. Every image is a playground for your imagination.


