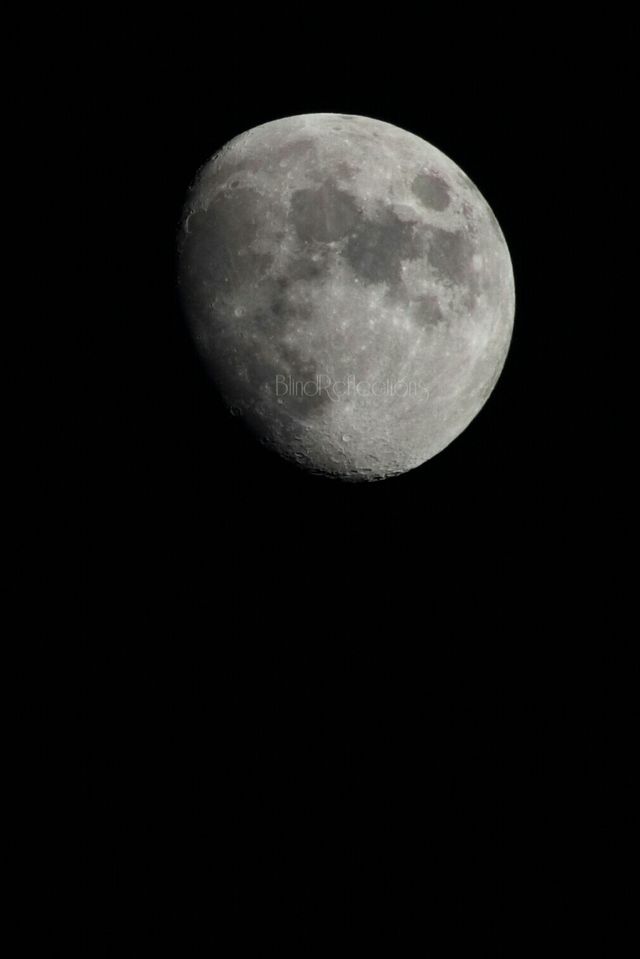
There is something very elusive about the moon. It it so interesting and majestic to our eyes – but try taking its picture and it usually ends up looking like a tiny, white orb. So how are those intricately detailed moon photos made?

If you answered, “With expensive equipment”, you might be right, but you might not be. Obviously, making photos with a high-quality camera and a telescope-lens are going to render the best image quality, but excellent moon photography can be done on your smartphone, too!
What went wrong?
Before we get started, we have to understand why pictures of the moon don’t always work out. For one, it often looks so tiny in a photo compared to how we see it with our eyes. This happens all the time because most cameras come with a wide-angle lens (one that sees a larger field of view than our own eyes do) that makes every object within view appear smaller.
The moon usually turns out very bright as well, glowing white and washing out any detail you might see in it. Even though it doesn’t emit light, it reflects a lot of it – enough of the sun’s rays to light up the whole night. Unless you’re in the city, that means that the moon is going to be several times brighter than anything on the ground. Because your camera’s goal is to get the majority of the scene in proper lighting, it will overexpose the moon in order to properly expose the rest. We don’t see this ourselves, because our eyes can detect a much wider range of light than a camera’s sensor can.
So how to photograph the moon, then?
Ideally, you’d have a DSLR with a long telephoto lens zoomed all the way in, mounted on a sturdy tripod and set on aperture-priority or fully manual mode. You’d use your lowest ISO and a medium-small aperture like f/11, and after getting a base exposure using spot metering on the moon, you’d bracket your exposures by taking several shots at different shutter speeds so that some turn out dimmer and some brighter. You would then choose the most successful of these.
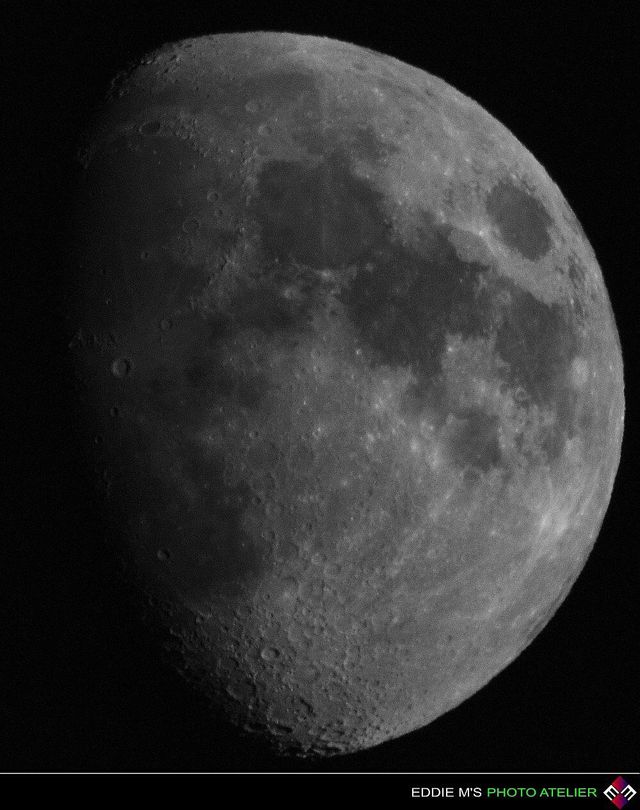
Of course, not all of us have these options. Whatever kind of camera you do have, though, you’ll want to be able to zoom in as much as possible in order to magnify your frame and bring out greater detail in the moon’s surface. If you have access to a telephoto lens or a compact camera with a large zoom, use it! Don’t forget the tripod, whenever possible; it will allow you to take sharper images and keep the camera still while you take your shots.
If you can’t make manual exposure adjustments on your camera, set it instead to a “night landscape” (or regular “landscape”) scene mode that will optimize settings for you. Nearly every camera will allow you to select your own ISO – this option is usually found in the menu. You can also bracket your shots on most cameras by using the exposure compensation (+/-) option to turn the picture’s brightness up or down. Take one shot with the compensations set at 0, then one each at -1, -2, +1, and +2. Compare them afterward and choose the best.
These principles can apply to smartphones as well, but because the lenses on phone cameras usually don’t really move, all that “zooming” is doing is make the moon fill the frame by cropping the image smaller, which results in low picture quality. However, because the phone’s lens is internal, you can press it up against the eyepiece of any regular telescope, turning it into a make-shift lens attachment. Through the telescope’s viewfinder, you can magnify the moon many times in order to get a great close-up. Simply use the ISO and brightness tools in the PicsArt camera app to get a perfectly exposed moon shot.
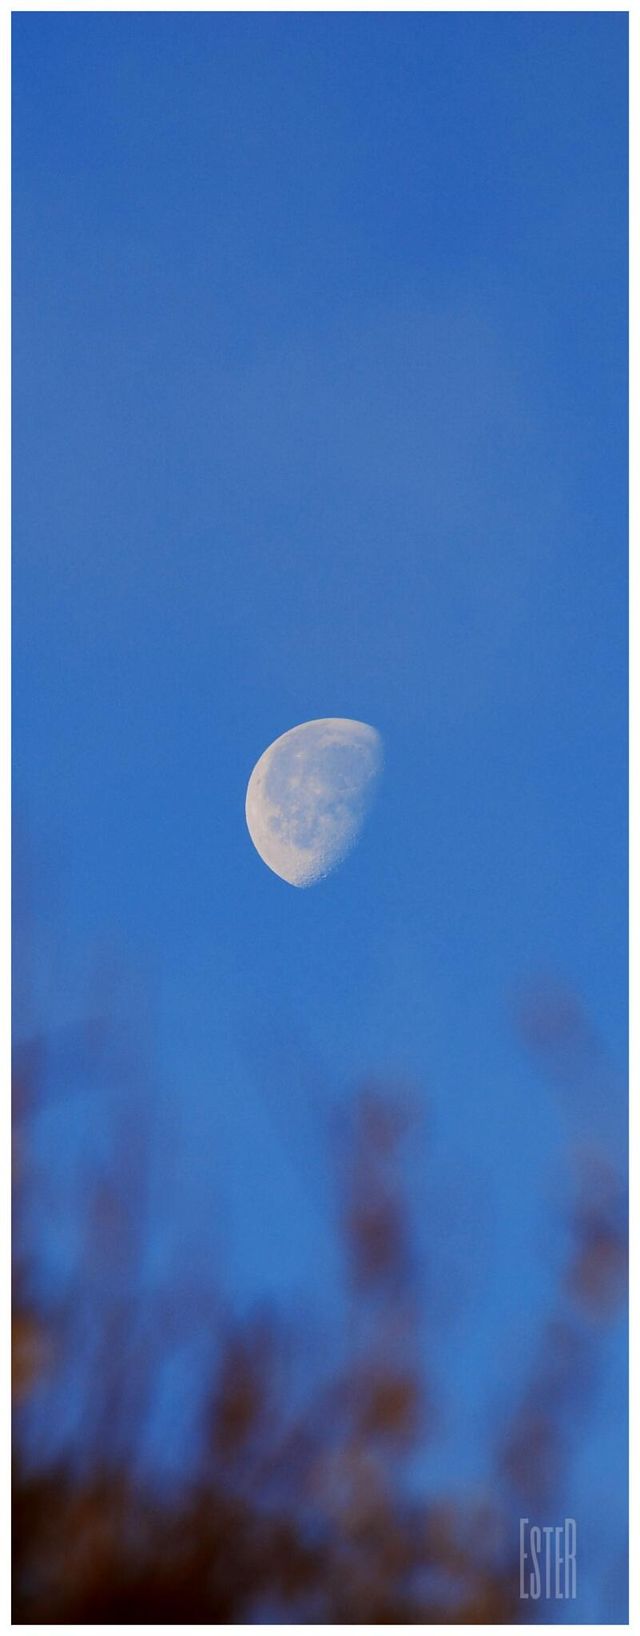
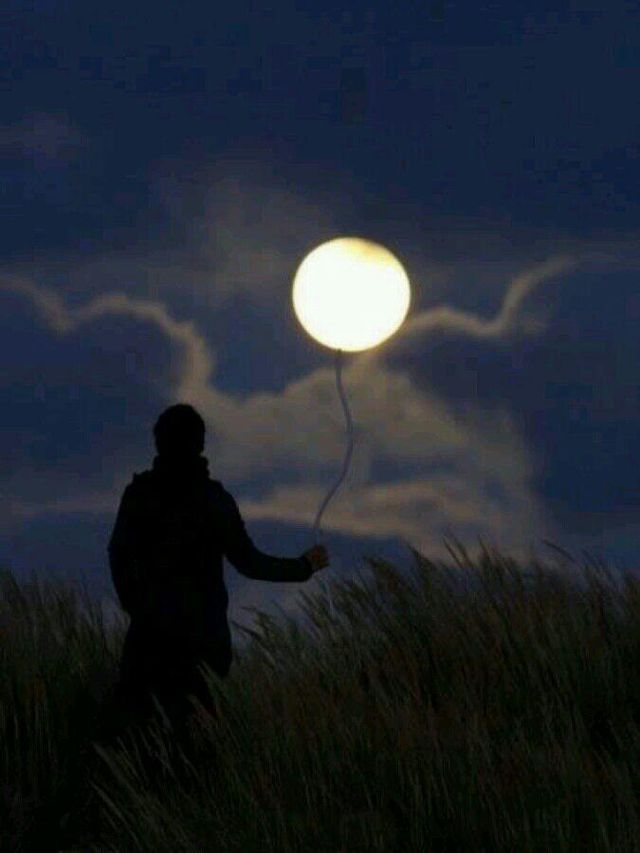
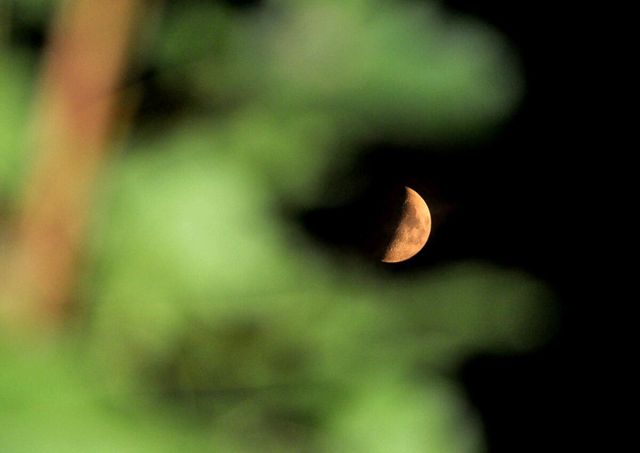
Don’t forget that even though you’re photographing something uniquely interesting, you shouldn’t forget about the rules of photo composition. Add interest to your image by framing the moon off-center, or adding a foreground element such as a tree, a mountain, a building, or something reflective like a lake or window. Pay attention to the lines and shapes on the moon’s surface, and how they draw the eye around the picture. Try photographing the moon in different phases, as it waxes and wanes between a sliver and a full circle.