
Many photographers mistakenly shy away from the manual “M” mode on their camera, thinking it’s reserved for those with years of experience. The truth is, the automatic settings are typically at the root of most issues plaguing photographers. From inconsistent exposures to blurry photographs, these supposed beginner modes are anything but user-friendly. If you’re ready to take control of your camera, now is the time to leave the A, S, P, AV, TV modes behind. Once you realize the unlimited creative control of the manual setting, you’ll wonder why you didn’t switch sooner.

Decision 1: The Aperture
There are only three ways to allow light into the camera. Let’s start with the first point of entry; the lens.
When you select a wide aperture like f2.8 or f4, there is a large opening inside the lens. The wider this opening, the more light will get in. The opposite is true with small apertures such as f11, f16 and f22. When using these f-stops, the actual opening in the lens is very small. This reduces the amount of light that reaches the sensor. Here’s a chart to illustrate this concept.

Besides its ability to control the amount of light that reaches the sensor, the aperture also dictates your depth of field. At wide apertures like f2.8 and f4, your subject will be sharp, but the background will be blurred. Since a wide aperture allows an abundance of light into the camera, you may need to use a faster shutter speed to avoid overexposing your subject.
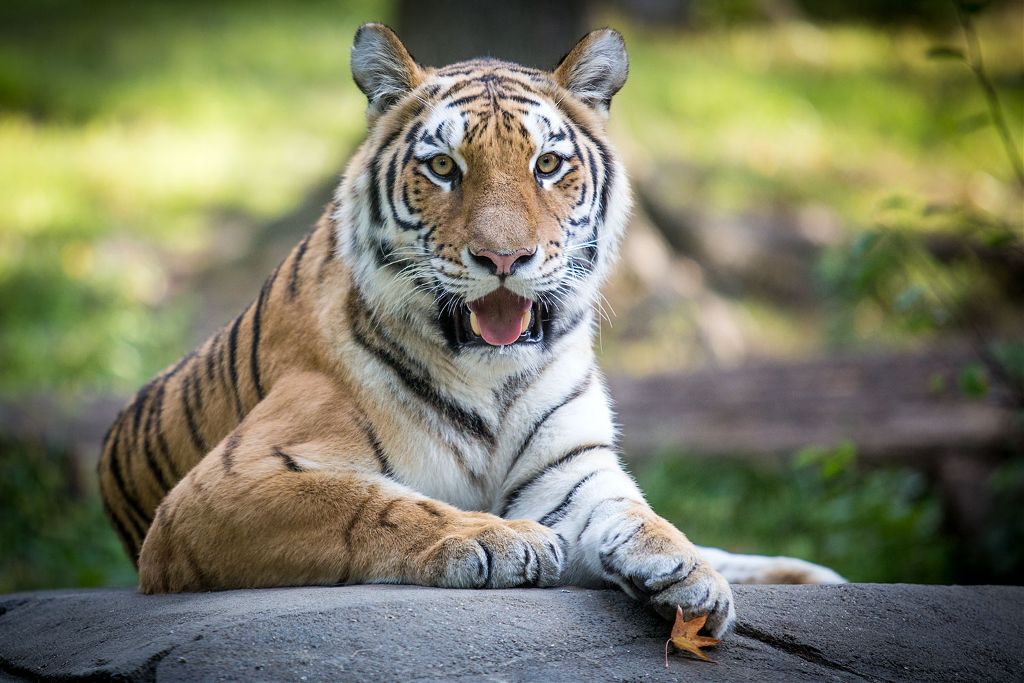
A small aperture like f16 or f22 will keep the entire photo sharp from near to far. A helpful phrase to remember is “The greater the F Stop number, the greater the depth of field”. Since a small aperture does not let much light into the camera, you may need to use a slow shutter speed to prevent underexposure. Of course part of this consideration depends on how much available light you have to work with.
Decision 2: The Shutter Speed
The shutter speed you select is partially responsible for how much light enters the camera. Fast shutter speeds such as 1/250, 1/500, and 1/1000 will freeze the subject’s motion but will only expose the sensor to light for a very short time. As a result, you may want to use this with a wide aperture like f2.8 or f4.

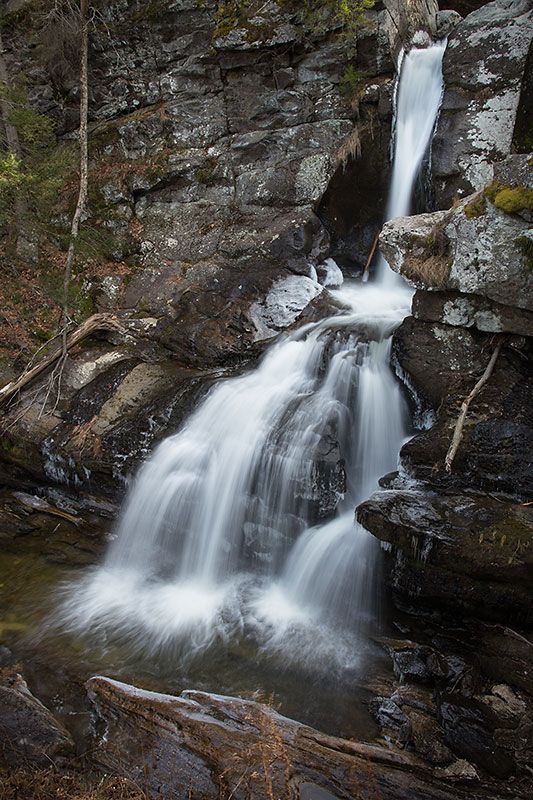
With a slow shutter speed however, you’ll show the motion of a subject for up to thirty seconds, and sometimes longer with the BULB mode. These long exposure times allow a great deal of light into the camera. To avoid overexposure, you’ll typically need a small aperture opening like f22.
Decision 3: The ISO
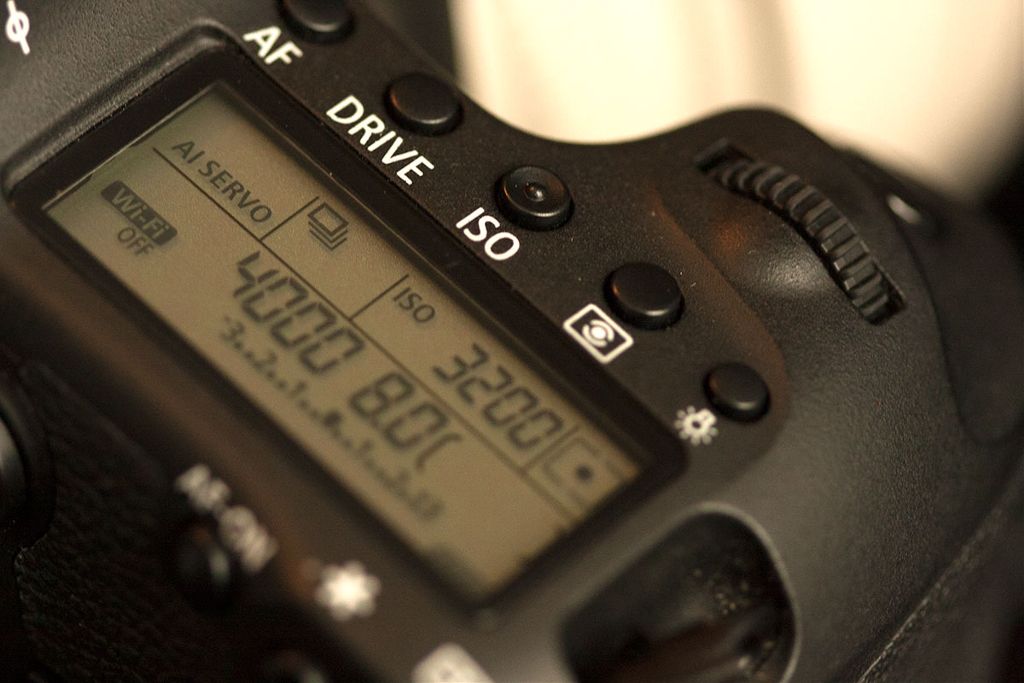
Now that you’ve decided on the appropriate aperture and shutter speed for what you’re trying to achieve, you’re well on the way to achieving consistent results. The last part of the process is the ISO. Simply put, the higher the ISO number, the more light the camera’s sensor absorbs. Just note, that a very high ISO may be necessary even on a bright sunny day. For example, if you are shooting with a fast shutter speed of 1/1000 to freeze action, and a small aperture of f8 for medium depth of field, the photo may be too dark. When this happens, just double the ISO. By going from 800 to 1600 you will see an immediate improvement.
As you can see, all three settings work together to form the overall exposure. In Part 2 of this tutorial, we’ll discuss how to use the camera’s internal light meter to fine tune your images.
Photos and Text by Chris Corradino


