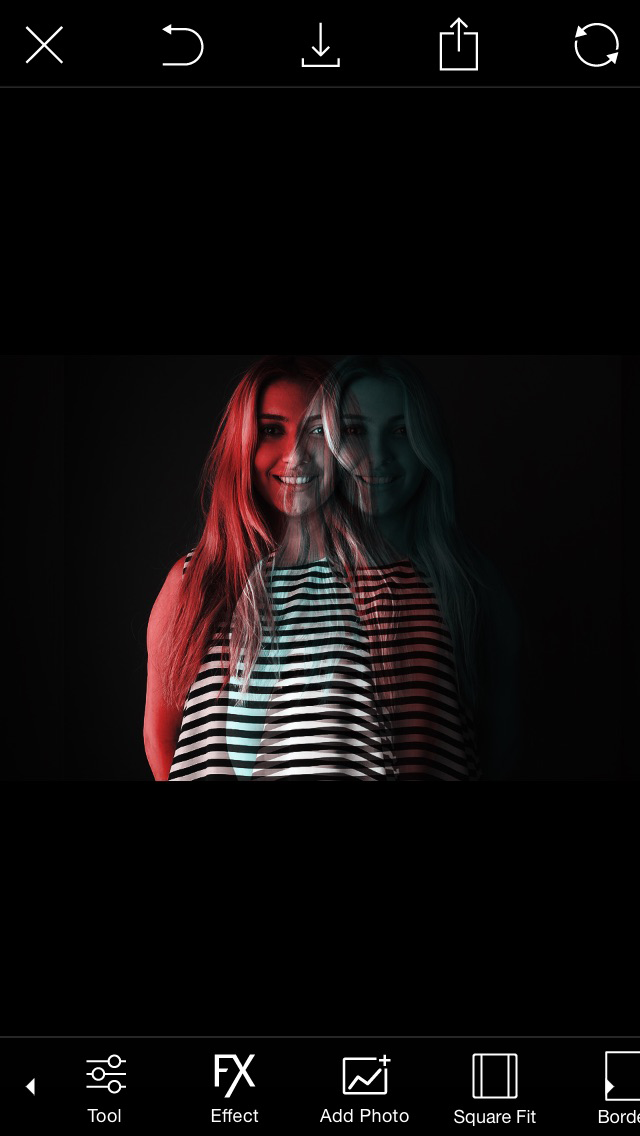
The Holga 2 Effect is a versatile tool that makes your images look as if they have been taken with a Holga camera. In this step-by-step tutorial, we’ll show you how to use the Effect to create a quirky double exposure with just a few simple steps. Follow along to learn how to use the Effect, and share your edits with the hashtag #Holga!
Step 1: Open Effects Menu
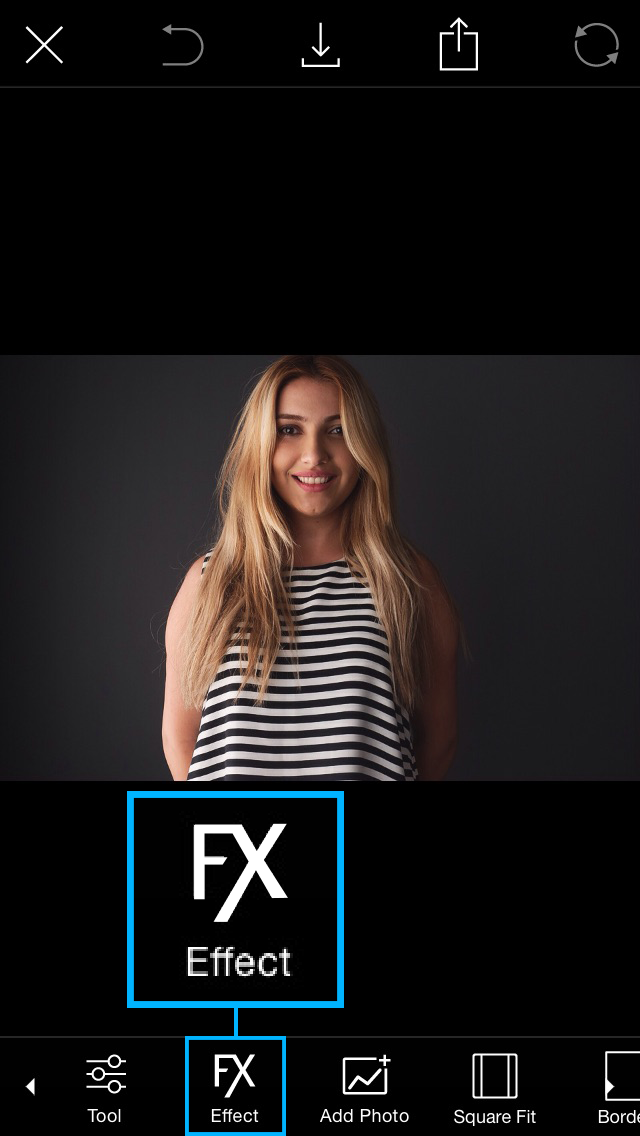
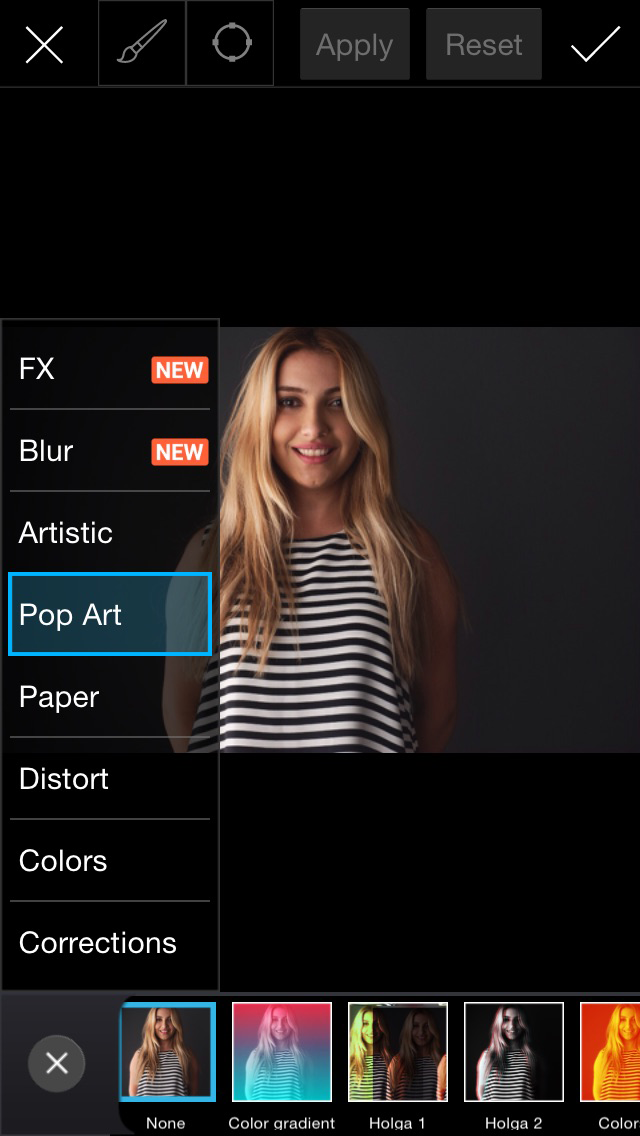
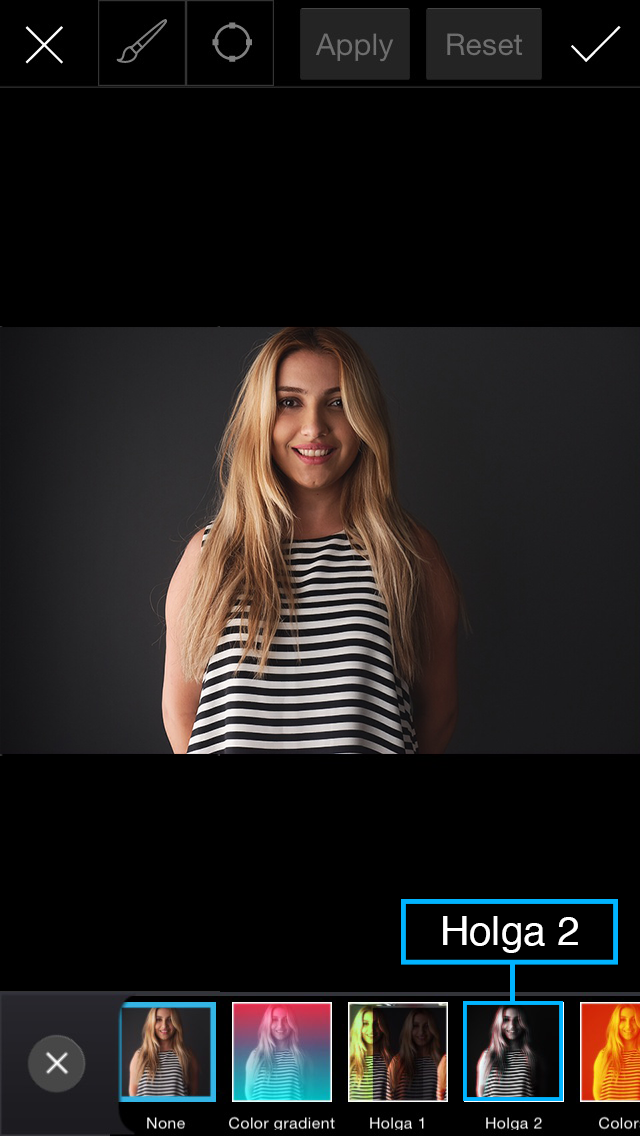
Open your image in the Editor and tap on Effect. Select the Pop Art section.
Step 2: Select Effect
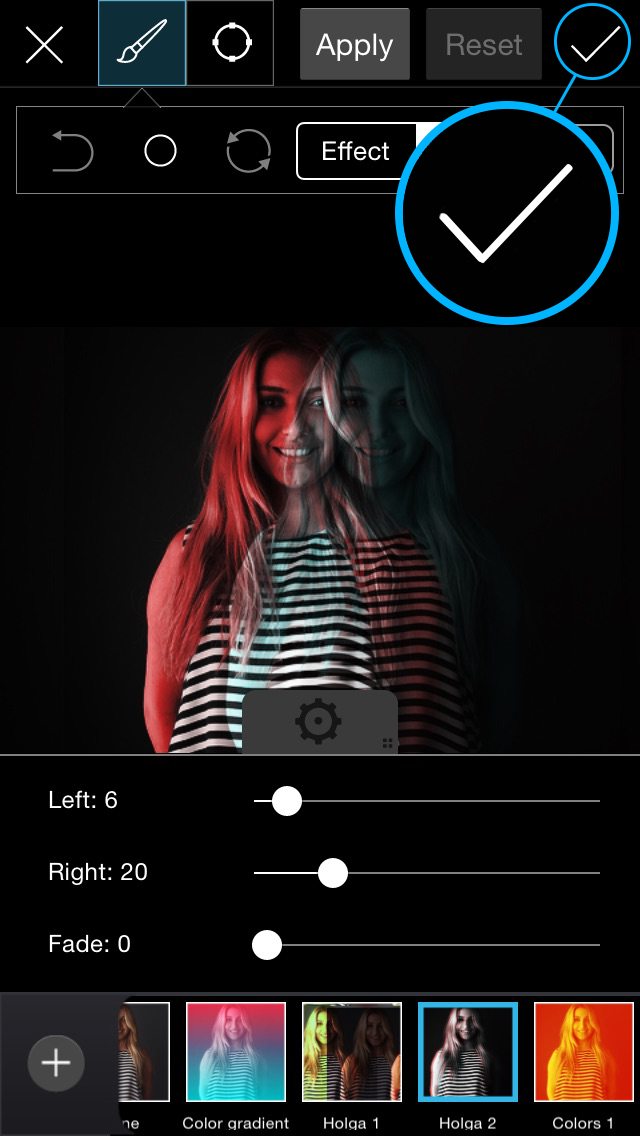
Select the Holga 2 Effect. If you’re using an Android device, tap on the gear icon to open the settings menu. If you’re using an iOS device, this menu will open automatically.
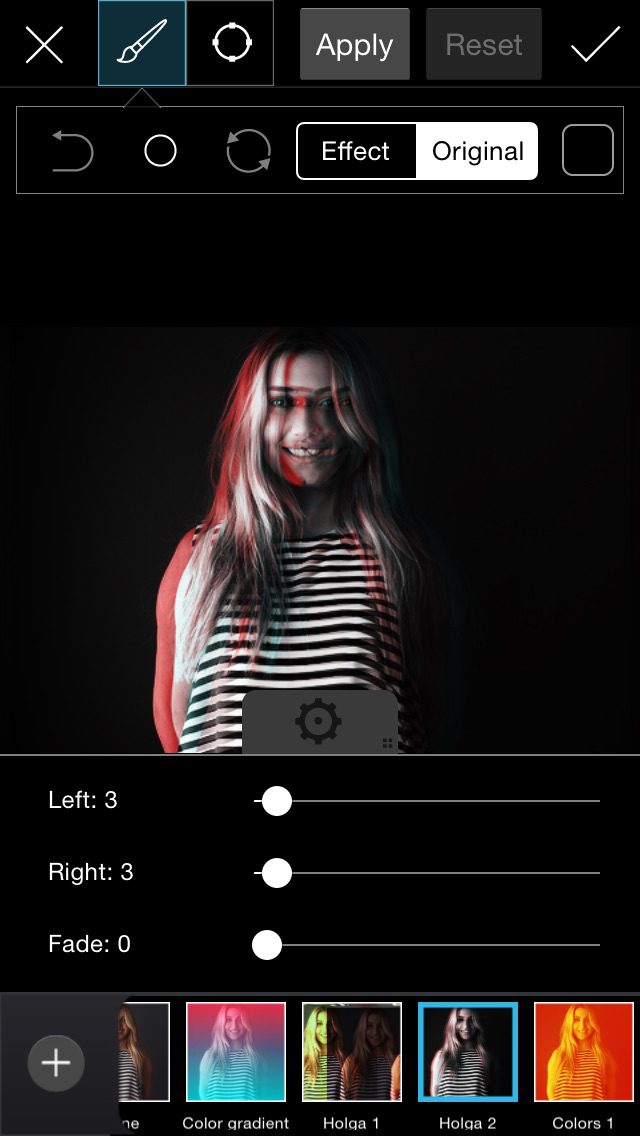
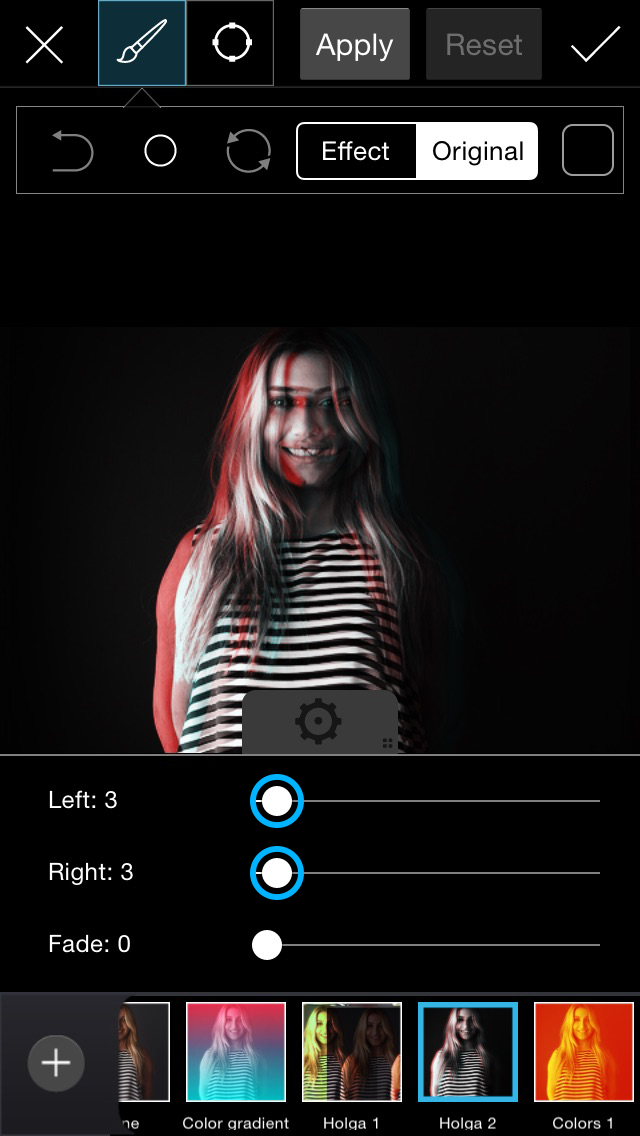
Step 3: Customize Effect
Adjust the sliders to customize your Effect. We decided to increase the Left and Right sliders, but you can play with the settings until you’re happy with your creation.
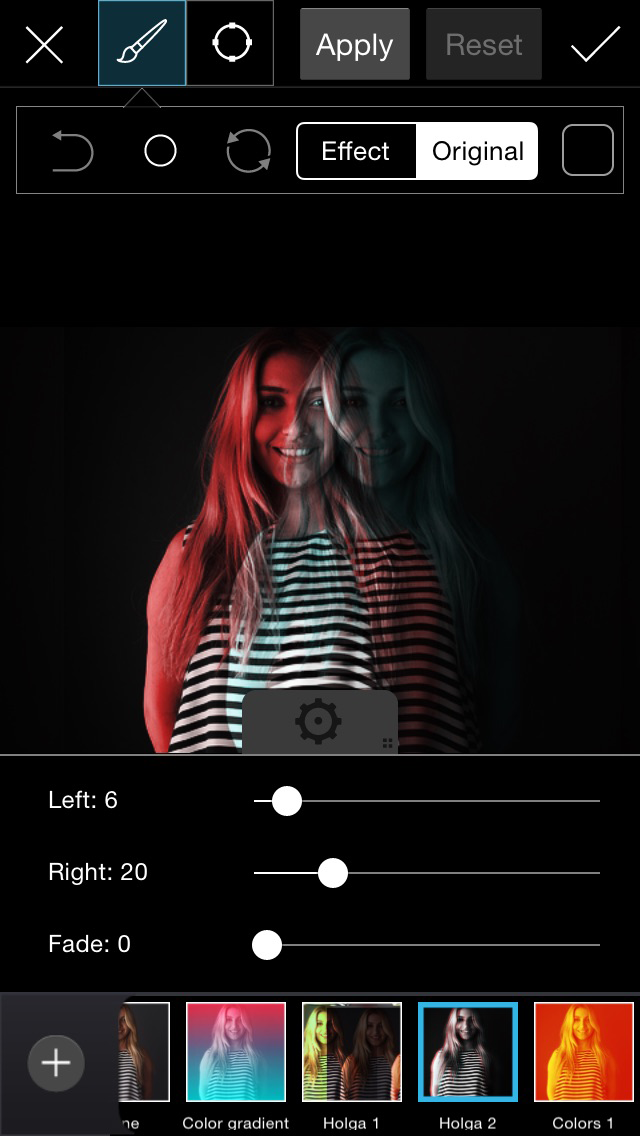
Step 4: Confirm & Finish
Tap on the check mark to finish applying the Effect. Don’t forget to save your image and share it with the hashtag #Holga!
