
Contents
Wedding invitations play a crucial role in setting the tone for your special day. They are the first glimpse your guests will have into the theme, style, and formality of the event, serving as both a practical tool and a reflection of your unique love story. A thoughtfully designed invitation can leave a lasting impression and build anticipation for the celebration to come.
However, the thought of designing your own wedding invitation may seem overwhelming to you. If that’s the case, don’t worry, we’ve got you covered.
In this guide, we will take you through the step-by-step process of how to make wedding invitations.
Step 1: Choose a wedding invitation style
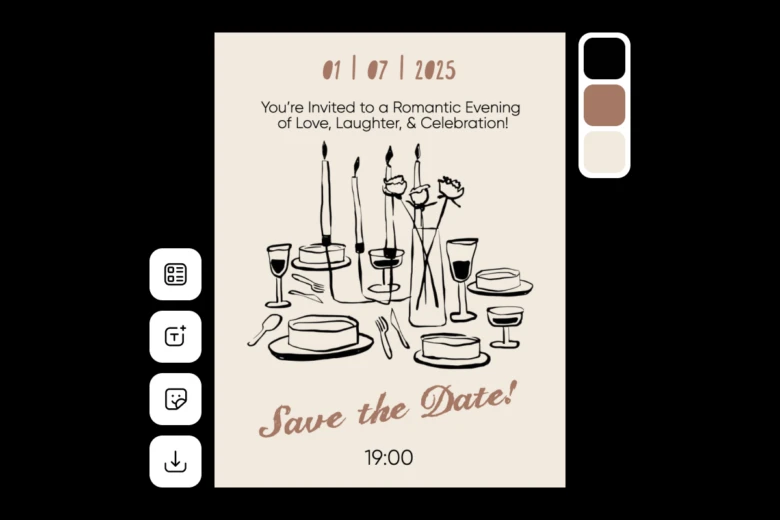
The first step in how to make wedding invitations is to choose the style of your invitation. You’ve got hundreds of options to choose from, like traditional, modern, rustic, vintage, and more. As you think through your wedding invitations, consider your wedding theme and your personal preferences. Obviously, the big day is yours and you want your wedding invitations to reflect who you and your spouse are as a couple.
If you need some inspiration, check out our beautiful, professionally designed wedding invitation templates. Or, design your own wedding invitation from scratch using our wedding invitation maker.
Step 2: Gather supplies and tools
When creating your wedding invitations, it’s important to gather the right tools and supplies. Depending on whether you’re making them by hand or opting for a digital approach, your list may vary.
If you’re doing your invitations by hand, you’ll need high-quality cardstock or paper, envelopes, a paper cutter or scissors, rulers, adhesive like glue or double-sided tape, and decorative embellishments such as ribbons, stamps, or stickers. You’ll also want to have high-quality pens or markers for writing and calligraphy if addressing envelopes or adding personal touches.
For digital invitations, you’ll need a computer or smartphone, design software or access to online design tools like Picsart, as well as a good quality printer if you’re printing at home. Don’t forget ink or toner and sample paper to test designs before printing the final versions
Step 3: Design your wedding invitations
Selecting the right layout, fonts, and color schemes for your wedding invitations is an important part of the design process. The layout should be clean, organized, and easy to read. Start by deciding how you’ll structure the content, ensuring important details like the names, date, time, and venue are prominently displayed.
Experiment with different alignments, such as centered, left-justified, or a combination, until you find a style that complements your overall theme.
Wedding fonts play an important role in setting the tone of your invitations. For a formal wedding, elegant script or serif fonts work well, while modern weddings might lean toward sleek sans-serif fonts. You can also mix and match fonts, like pairing a fancy script font for names with a simpler font for the event details, but limit your choices to two or three fonts to avoid a cluttered appearance. Explore our library of fonts to find the perfect font for your invitation.
Your color scheme should align with your wedding colors and theme. Soft pastels and neutrals create a classic, romantic feel, while bold, contrasting colors make a statement.
Use complementary colors for the background, text, and embellishments, ensuring there’s enough contrast so the text remains legible. Testing a few variations can help you find the perfect combination that reflects your style while maintaining readability and visual appeal.
Step 4: Choose the right wedding invitation wording
Next, you need to choose the perfect wedding invitation wording. Let your imagination go a little wild while you brainstorm possible options. You can keep it traditional and formal, or add a touch of personality with a witty or heartfelt quote.
Make sure to include all the essential information such as the names of the hosts and couple, date, time, venue, attire suggestions (if any), RSVP details, and any other important details you want to convey.
If you’re a guest attending a wedding, you’re going to want to check out the guide on What To Write In A Wedding Card.
Step 5: Add finishing touches
Finally, add any finishing touches to your wedding invitation. This could include adding a personal touch, such as a monogram or custom illustration, or incorporating other elements like a photo of the couple or a map to the venue.
Don’t forget to proofread your invitation for any typos or mistakes. It’s always helpful to have someone else look it over as well for a fresh set of eyes.
Once everything looks perfect, it’s time to print and send out your invitations! Remember to keep track of RSVPs and make sure to personalize any additional details for specific guests, such as menu options for dietary restrictions.
Step 6: Send your wedding invitations
Congratulations, you’ve designed your wedding invitations! Now it’s time to send them to the guests. You can choose to send them via traditional mail or opt for a more modern approach like email invitations.
If you’re not sure when to send your wedding invitations, you should plan on sending them out at least 6-8 weeks before the wedding date to give guests enough time to RSVP and plan accordingly.
Wedding invitation examples
To give you some inspiration as you design your wedding invitation, here are 5 examples of wedding invitations.
Elegant wedding invitation in pink
This wedding invitation features a stunning pink floral design with elegant lettering. It’s perfect for a romantic and traditional wedding. Use this template.
Beautiful floral wedding invitation
Featuring a beautiful watercolor-esque design, this wedding invitation is perfect for a spring or summer wedding. The soft pastel colors and delicate flowers give it a romantic feel. Use this template.

Sleek arrangement of lemons
Simple elegance is the theme for this wedding invitation, with a sleek arrangement of lemons adding a touch of freshness and vibrancy. The yellow hues bring a pop of color to the otherwise neutral design, making it perfect for a sunny outdoor wedding. Use this template.

Happy-go-lucky
For a fun and playful wedding, this invitation template is the perfect choice. The whimsical font and bright colors give it a happy-go-lucky feel that will set the tone for a joyful celebration. And with customizable options for adding your own personal touches, this template allows you to make it uniquely yours. Use this template.

Simple, minimalistic wedding invitation
It’s hard to beat the timeless elegance of a simple and minimalistic wedding invitation. With clean lines and a classic font, this template exudes sophistication and refinement. Perfect for a more formal affair, this design allows you to showcase your love without any distractions. Use this template.

Quick wedding invitation design tips
- Keep the design simple and easy to read
- Use a cohesive color scheme and font throughout the invitation
- Make sure all important information is included in the invitation, such as date, time, venue, attire suggestions, RSVP details, etc.
- Consider adding a personal touch or customization to make the invitation unique
- Don’t be afraid to get creative with your wording and format as long as it still conveys all necessary information clearly
- Proofread multiple times before printing or sending out invitations
- Choose high-quality paper or materials to give your invitations a polished and professional look
- Double-check postage requirements, especially if your invitation includes additional inserts or is an irregular size
- Add a return address and consider including a stamped RSVP envelope to make it easier for guests to respond
Conclusion
Now you know how to make wedding invitations! Your invitations are an important part of your special day as they set the tone for your wedding and provide guests with all the necessary information.
By following these steps and tips, you can create beautiful and effective invitations that will impress your guests and make them excited to attend your wedding. Don’t forget to also have fun with the design process and let your personality shine through in your invitations.


