Wondering how to blur a picture? You’ve come to the right place! Blurring photos is an amazing way to accentuate a part of a photo, drawing the viewer’s eye to the in-focus part you want them to notice first.
Whether you’re blurring people in the background or accentuating specific colors, Picsart can help you easily achieve that dreamy blurry effect with just a few clicks or taps. Below, we’ll dive into four ways to achieve a blurring effect: how to blur an entire picture, how to blur part of a picture, how to blur a background, and how to blur faces in a photo.
4 creative effects to blur pictures
Before you learn how to blur a photo, it’s important to understand the different blur effects you can use to elevate your pictures. From dreamy bokeh blurs to in-motion photos, here are the trendiest blur effects to make your photos more dramatic.
1. Motion blur
Want to simulate motion in your pictures? Motion blur is the answer. When you add motion blur to a photo, you’ll create the illusion of motion by adding the streaking of moving objects caused by rapid motion or long exposure times.
To create an ultra-realistic blur effect, make sure to drag your blur toward the direction of movement. For example, if you’re editing skateboarding pictures, you’d drag the blur forward to mimic the movement of the skateboard.
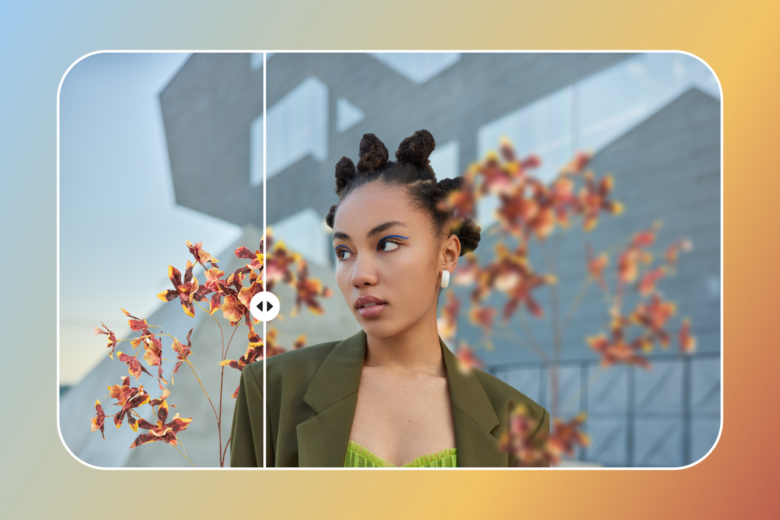
2. Radial blur
With the radial blur effect, you can create an area of focus on an image while blurring out the rest of your photo. The radial blur offers a simple way to create a shallow depth of field and add emphasis to the main subject of your picture. You can also adjust the blur to create a gradual blur or a more dramatic effect based on your creative preferences.

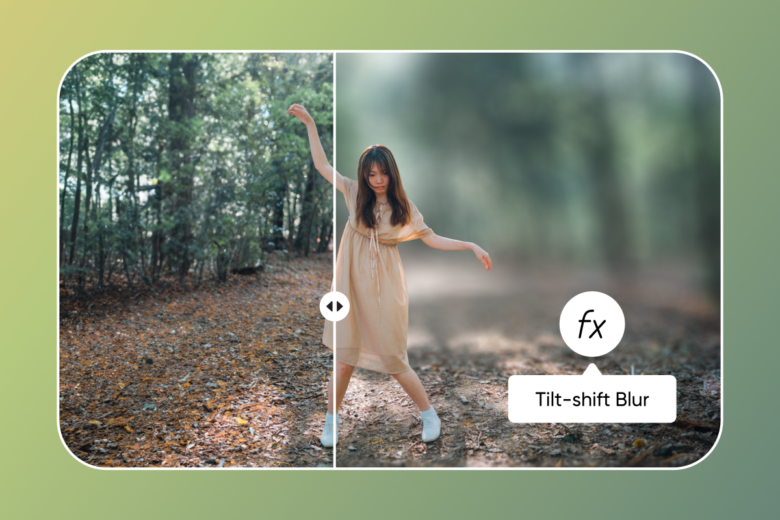
3. Tilt-shift blur
Similar to forced perspective photography, the tilt-shift blur effect makes the objects in your photo look like miniature models. The name stems from the camera lens used to achieve this effect, but it’s also possible to create a tilt-shift blur with photo editing tools like Picsart.
To instantly add a tilt-shift blur to your photos, try adding blur to the top and bottom of your image to create the illusion of a shallow depth of field. This way, the scene will look smaller, resulting in a fun miniature effect.
4. Bokeh blur
Bokeh comes from the Japanese word boke, which means “blur” or “haze.” In photography, the bokeh effect involves creating a blurry background using a fast lens at the widest aperture.
So, how can you create a bokeh effect with photo editing tools? On Picsart, choose the Mask icon from the bottom of the screen. Then, tap on the Boken tool to experiment with different types of bokeh effects, like circular-shaped blurs and heart blurs. Once you’ve found the right effect, you can fine-tune the opacity, hue, and other details to create a dreamy blur.
How to make a photo blurry
Picsart’s full range of editing tools and different blur effects make it easy to blur a photo. Here is your simple step-by-step guide to adding a blur effect to your photo:
- Open the Picsart app and tap the plus sign (+) to upload your photo. You can also choose to work from any of the #FreeToEdit images.
- Tap on Effects in the bottom toolbar and scroll to find Blur. Pick one of our many Blur filters. We like how the Focal Zoom and Radial Blur effects allow you to pick the focal point of your image. (Pro tip: If you want to further manually adjust the blur, tap and hold the filter to adjust Blur, Fade, Size, Hardness, and more.)
- Once you’ve achieved the perfect blur image, tap Apply to save it on your photo. Tap on Next to save and export your photo or instantly share it with your friends and followers across the web!
How to blur part of a photo
Sometimes, you’re not looking to blur the whole photo, but just a part of it. This is often done to focus the viewers’ attention on a certain aspect of the photo and not be distracted by other elements.
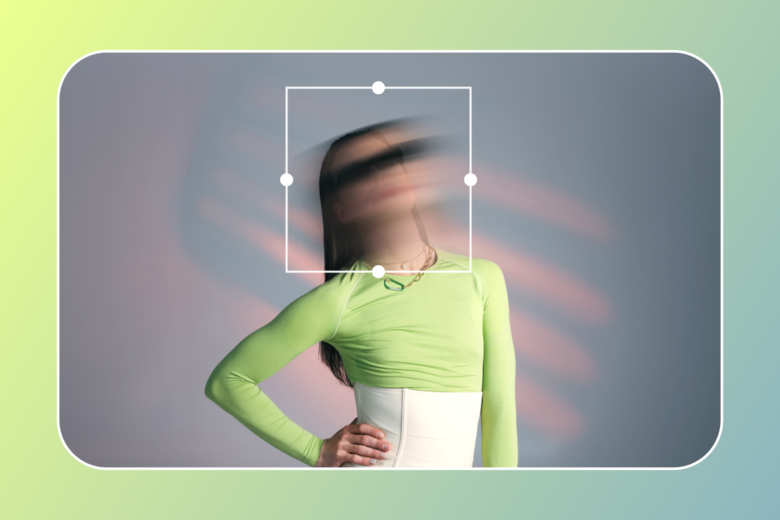
For example, if you blur out the face of a person on a swing, it’ll make the viewer focus on the silhouette more and hint at the dizziness that swinging is known to cause. You can also use this effect to focus on something in the foreground like we’ve done below to keep your eye on the image on the phone.

Another mind-bending blur effect is to create a mirror image and then use a blurring effect on the background to draw the viewer’s attention to the mirror edit aspect. Keep in mind that blurring a part of a photo is a very direct artistic interference, and it’s always better if you can justify to yourself why you’re making that edit, like in these examples.
Time to start editing! Here’s your comprehensive, step-by-step guide to blurring just part of a photo.
- Open the Picsart app and tap the plus sign (+) to import your photo.
- Scroll across the bottom toolbar and tap on Tools, then Selection to select the part of the photo you want to blur.
- Depending on the shape of the part you want to blur, there are quite a few different tools you can use to select it here. Tap Select to let our AI Select auto detect specific parts of your image. Alternatively, you can tap Oval if you’re blurring out something round or Rectangle if you’re blurring out a rectangular shape. In most cases, however, the shape will not fall into any of the categories, and you’ll need to tap on the Lasso or Brush to outline the part you want to blur.
- Now that you have your soon to be blurred out area highlighted in red, tap Effects on the upper menu and tap Blur to open and apply the Picsart blur filter that’s right for your project. This will give the area outlined in your photo the blurred effect that you’re looking for.
- Tap Apply to save when you’re done customizing the filter. Then, tap Next to save and export your photo or immediately post it on your social media accounts. It’s that easy! You just used an app to blur part of a picture!
Don’t forget that you can further adjust the blur settings while in this blur app tool. If you want to further adjust, tap, and hold the filter to manually adjust the blur effect to fit your taste.
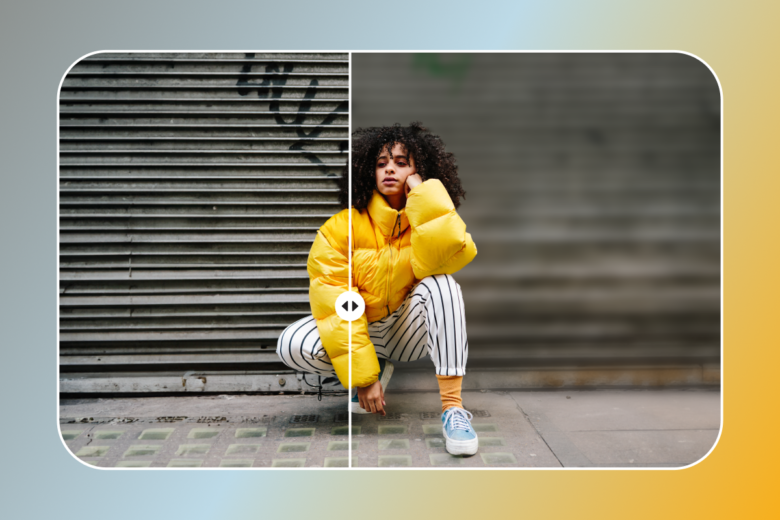
How to blur the background of a photo
When discussing blurred backgrounds, it’s hard not to recall the famous candid photograph by Elliott Erwitt of a couple’s kiss reflected in a car mirror. The breaking waves in the background, though paramount to the atmosphere, are blurred to indicate just how engulfed the couple is in the tender passionate moment they’re having.
Although, in most cases, people blur out backgrounds for pictures less iconic to the history of photography, the effect of deeming the background somewhat less important remains relevant.

Sometimes, no matter how scenic the background of a picture is, the focus of the viewer is often going to be the people and happenings in the foreground. So, why not help your viewer out by guiding their gaze with the addition of a beautiful bokeh effect?
Follow our step-by-step guide below to learn how to blur a picture’s background. Looking for a deep dive on background blurring? Check out this comprehensive guide to blur the background of a photo.
- Open the Picsart app and tap on + to upload your photo.
- Tap on Effect in the editing toolbar and then pick Blur from the menu below. Try out all the filters and pick the one you prefer. You can also tap and hold on the filter to manually adjust the blur.
- Now, tap the Eraser in the upper menu and swipe over the area you want to keep in focus. Since we want to blur just the background, you’re using this step to erase the blur effect from the foreground. Voila!
- Tap on the check mark in the upper right corner and then tap Apply to save your blur effect. Tap Next to save and export your photo or share it with the Picsart community.
Want to play around with other background effects? Consider making your background transparent, playing around with geometric shapes, or changing the background color.
How to blur faces in a photo
A blurred face tends to remind people of true crime documentaries, but — remember the above photo that drew your attention to the image on a phone? Or the idea of a person on a swing, dizzy from flight? In most cases, the context is actually artistic and thoughtful.
For example, you may want to blur out the face of a passerby eating a sandwich in the background of your family photo on the beach boardwalk. In general, it’s not that difficult to think of cases where ethics or artistic preference require you to blur a face in a photo.

Wondering how to blur faces in a photo? Here’s your quick editing tutorial:
- Open the Picsart app and tap the plus sign (+) to upload your photo.
- Tap Tools and then Selection to pull up the selection tools. This is where you’ll pick out the part you want to blur — in this case, a face!
- Tap Select and then Face. Our AI tool will automatically select the face in your photo and highlight it in red.
- Tap Effects in the top menu and choose Blur to open the range of Picsart’s blur tools. Pick your favorite blur filter (Blur, Focal Zoom, Radial Blur, Lens Blur, Smart Blur, and Motion Blur). This will blur the selected face in your photo. Don’t forget that you can manually adjust the blur settings by tapping and holding on any of the filters in this step.
- Tap Apply to save when you’re satisfied with the blur face effect. Now that you’ve blurred out a face, it’s time to tap Next to save and export your photo or post it online.
How to blur a photo online
Wondering where and how to blur a picture online? Picsart’s online photo editor has a number of different blur filters you can easily apply if you prefer editing on your computer.
Besides, you’ll surely have fun trying various other filters and effects, playing around with thousands of templates, or creating your own stickers, and perfectly adjusting the size of your pics for various social media platforms with just a click!
How to make a photo blurry on your phone
If you’re wondering how to blur a picture on iPhone, Android, or Windows phones, then check out Picsart, the best all-in-one photo editor app out there. There’s no better, easier way to rock your social media accounts and impress your friends, family, and business partners!
How do you blur a photo on the web?
Now that you know how to blur pictures on mobile, how do you blur a photo on the web? Here’s a step-by-step guide to transform your favorite pictures with an eye-catching blur effect.
- Open the Picsart web editor and select the photos you want to blur.
- Choose Effects from the top-panel toolbar. Then, use the Blur button to open Picsart’s library of creative blur effects.
- Experiment with different blur effects to find the right option. Whether you had a motion blur effect in mind or you’re just looking to blur a static background image, select the type of blur that fits your creative needs to test it out on your photo.
- Need to add any finishing touches? Customize your newly blurred photo with stickers, filters, and other effects in the Picsart editor.
When you’re finished blurring your photo, use the Export button to download the finished product and share it wherever, and with whomever, you’d like.
Blur effect FAQ
Now that you know how to add trendy blur effects to your pictures, you can upgrade your favorite pictures with out-of-this-world effects. Here are some common blur effect questions to help you navigate photo editing.
- Can I selectively blur specific areas of an image?
Yes, it only takes a few taps to blur parts of an image with the AI Select auto detect feature. Alternatively, you can select different shapes, like an oval or rectangle, to blur out specific areas of your image. If you’re looking to blur a specific area, you’ll need to tap on the Lasso or Brush to outline the area.
- How can I blur images on my smartphone or tablet?
To blur images on your smartphone or tablet, install the Picsart app and use our free, beginner-friendly blur effect features to enhance your favorite pictures.
- Is there a way to remove blurring from an image?
If you have a blurry picture, try using the Sharpen effect to remove the blur. Under Effects, tap Sharpen, and use the sliding bar to adjust the level of sharpness as needed.
- What should I do if I accidentally blur too much?
If you accidentally blur your image too much, try using the opacity tool to reduce the blur effect. You can also use the Eraser tool to remove blur from unwanted areas.


