
These days, there’s so much more to social media than an endless stream of selfies — and shelfies. Consumers, like you, are looking for unique content that is authentic to their brand and lifestyle. And the best way to capture your audience’s attention is to offer professional-looking creative images that are meaningful as well as aesthetically pleasing.
One way to make your Instagram feed stand out is to feature double exposure photography: an interesting old-school technique that yields captivating, otherworldly compositions. The traditional methods for achieving double exposure can be complex and tedious because they generally involve working with rolls of real film (we know, film cameras are basically antique items nowadays). But with the help of photo editing software, like Picsart, you can easily achieve the same effect digitally!
In this article, we show you exactly how to create double-exposed images digitally, without having to click a double exposure setting on a real camera. Learn all about the popular technique, then follow an easy step-by-step guide to achieve it on your own photos.
What Is Double Exposure?
In a traditional sense, double exposure photography means exposing the same piece of film to the light twice, resulting in two overlapping images. Professional photographers can do this manually using real film, but it’s not easy to do and requires careful precision and a thorough understanding of light and its effects on film. Let’s take a quick look at how this very old technique actually works.
When you take a film photograph, you are basically subjecting a piece of light-sensitive film with a chemical coating to the light reflected off of objects within the camera’s field of view. This piece of film then goes through a development process that finally produces a print photograph (which, in the modern era, can also be scanned and published digitally). Double exposure photography simply replicates this procedure twice on the same strip of film, so that when the photograph is developed, it reveals two images overlaid on top of each other. There’s more to the science behind all this, but the important takeaway is that double exposure places two or more images on top of each other, creating a transparent layered effect.
How did it all get started? Back in the 1800s, photographers noticed ghost-like images on their films. And some of them embraced it, so that’s how this new art form was born.
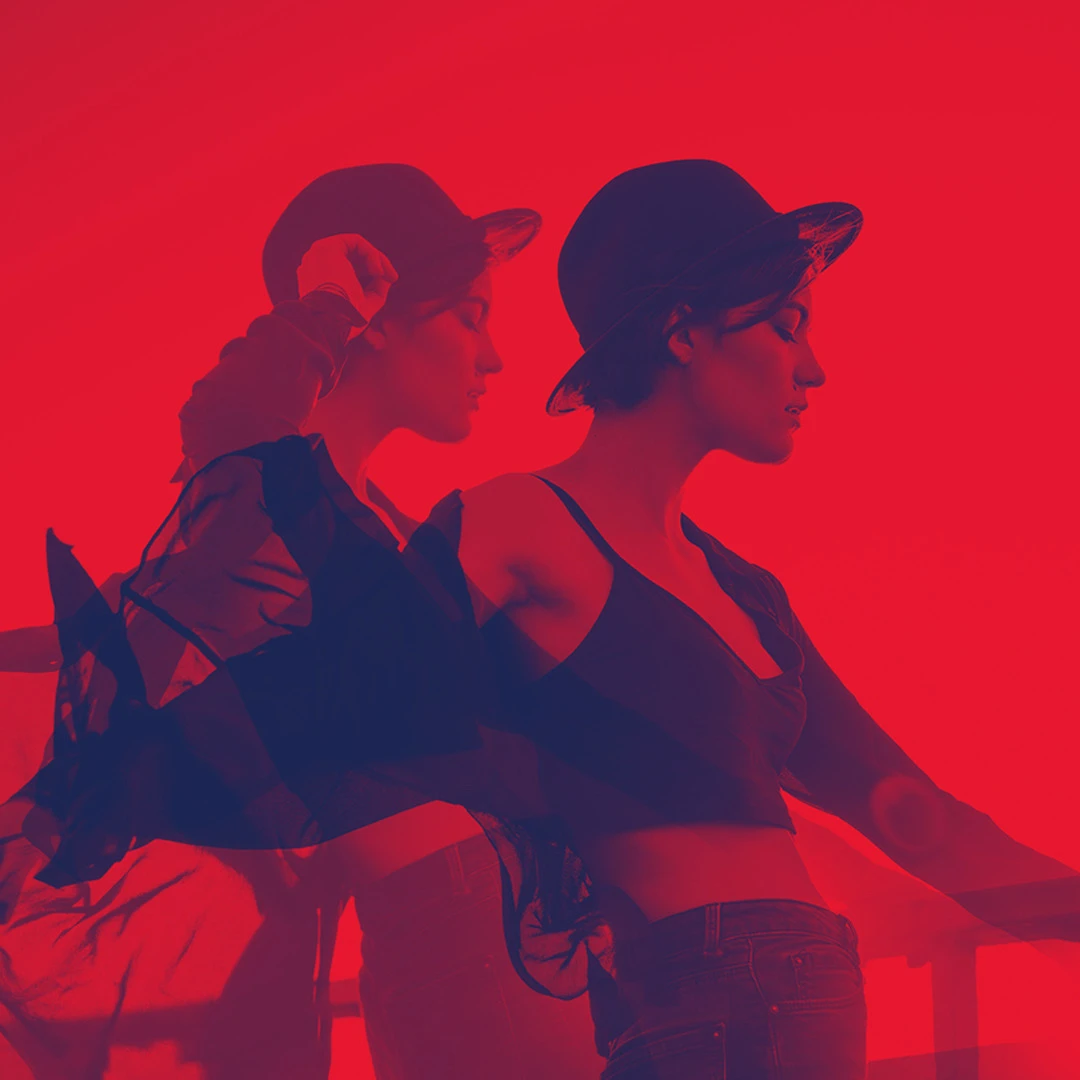
If you look at old-fashioned black and white double exposure photographs, you’ll see that the effect can be kind of ghostly and mysterious. The images captured together are nearly transparent and seem to be on the verge of vanishing into thin air. Of course, double exposure in a modern context can have a very different look. Since we are living in the age of digital photo editing, there are much easier ways to create double exposure photos, and the final results are often more dramatic and colorful. Today, photo editing pros are able to create double-exposed, layered images that not only overlap photographs but incorporate intricate patterns, gradients, and compositions. With digital tools, the possibilities are truly limitless!
A Step-by-Step Guide to Making Double Exposure Photos with Picsart
You don’t have to be a professional editor to enhance your social media feed with beautiful double-exposed images. To start creating your composition, you’ll need to select two images to blend together. You can even use more than two images if you’re feeling really ambitious, but, for the sake of simplicity, we will focus on using just two images throughout this tutorial. Later, you can replicate the same technique using several photos; the process is entirely the same.
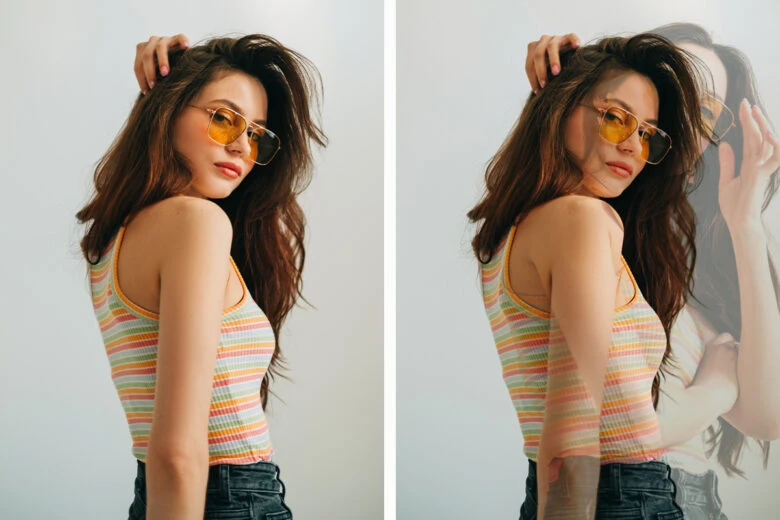
There are a few ways to go about selecting your images for double exposure. The first is to go the traditional route. If you were a photographer out in the world using real film, you would take two different pictures that are likely situated within the same context. For example, you might take a picture of a friend striking two different poses, and the result would show two overlapping images of that person. You can do the same with your phone camera, or, if you want a more modern look, you can choose to overlay patterns or two completely unrelated images. Technology really gives you a lot of freedom to get creative and blend images in a way that wouldn’t be possible if you were taking pictures out in the world in real-time using real film. Believe it or not, it literally takes less than five minutes to create an amazing double exposure photo with your Picsart app.
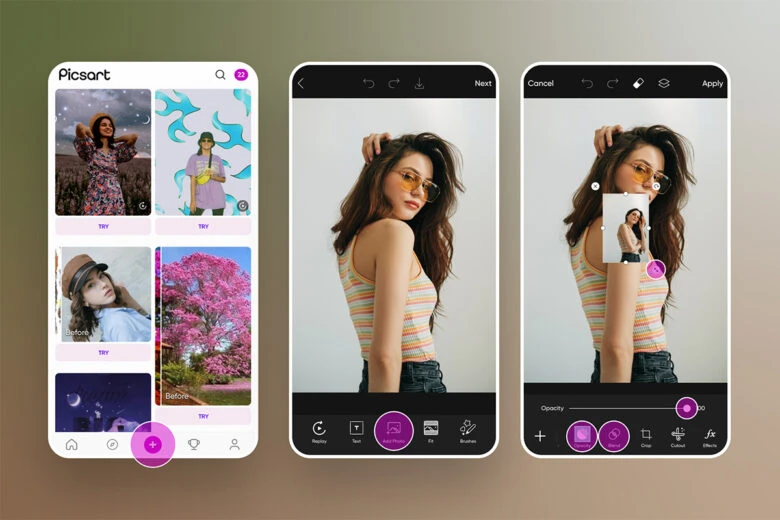
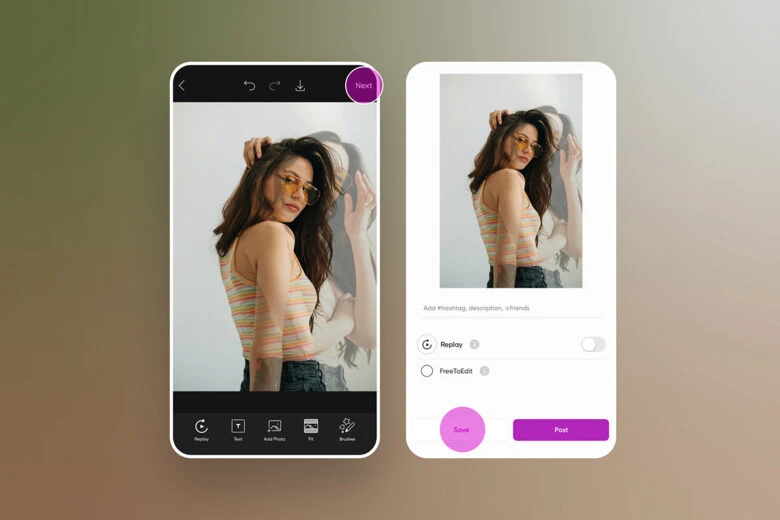
1. Once you have your images selected, open the Picsart app, and click the purple + button to upload your first image.
2. Once you’ve chosen the first image, click the Add Photo button and select the second image that you will be overlaying on your first selection. When you do this, you will see the second photo pop up in a relatively small size, enlarge it so that it covers the first image entirely, or as much as you see fit. This is your opportunity to play around with composition. Before applying the second image, there are two things you have to do. First, play around with its opacity. In your composition, you may want to emphasize one image more than the other, and reduced opacity can help maintain or retract focus from your background or foreground image. It’s up to your creative eye.
3. The next step, and this one is most important, is to adjust the blending modes for your composition. To do this, simply click Blend and choose the mode that you would like to use. For most compositions, you will want to select between the Lighten, Darken, or i options, as they create double-exposed images that maintain that traditional transparent quality. However, you may find another blending mode that works better with the images you’ve selected, it really depends on the base photographs and patterns you’re working with.
4. Once you’ve found a blend mode that works well with your images, click Apply. And voila! You now have a picture with the double exposure effect!
Tips for Creating Cool Double Exposure Photography
So now that you have the basics for creating double exposure images down, let’s talk about some interesting tips and tricks to keep in mind. There’s so much you can do with just a few tweaks to the usual process.
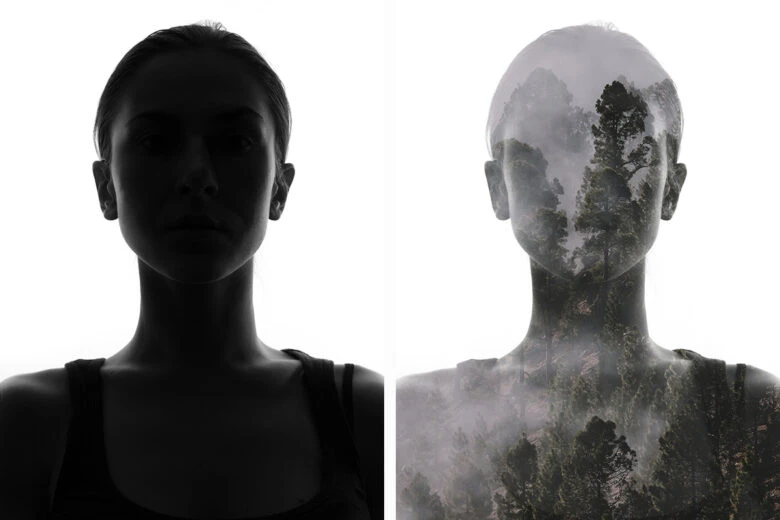
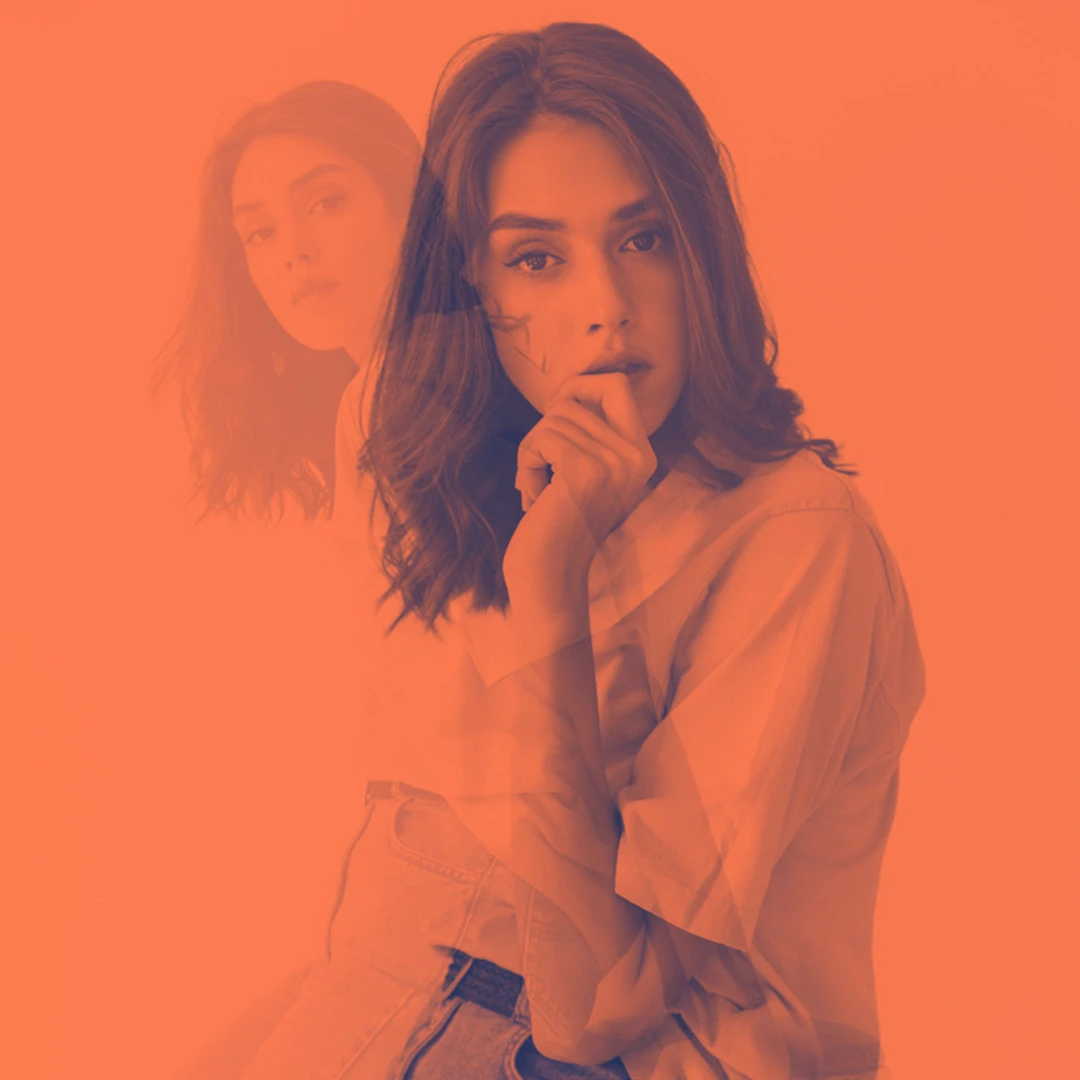
1. The double exposure effect works with a variety of different images, but one of the most popular ways to use this style is with portraits. You can even create double exposure pictures where the second image only appears over the portrait subject. To get this desired effect, follow the usual steps, but before applying the second overlapping image, use the eraser tool to remove it from the background of the first image. This way, you’ll outline your subject and add complexity and depth to the final image.
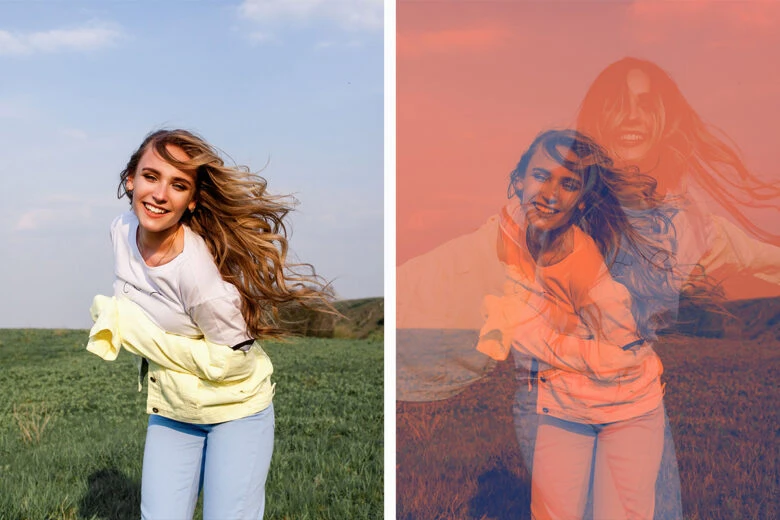
2. For the best double exposure results, try using a landscape or highly textured photograph as your second image. That way, you won’t cover up the portrait subject’s features or interfere too much with the original photograph’s details.
3. Play around with texture, pattern, and color. You can try using graphic patterns as your second image. Or maybe you want to try applying scenes from nature or cityscapes to give your photo an epic, scenic effect.
4. To create an even edgier look, try adding a blurring effect to your original image.
5. Choose images that are significantly different from one another. For example, the first image might be simpler and have clean lines, while the second might be more textured and noisy. In this way, the two images will complement each other and create a harmonious final result.
6. Using a black and white or monochromatic image as your second layer can be very helpful, because it will prevent your final image from being too noisy and keep its colors from clashing too much.
7. Another fun idea is to blend traditional photography with illustrations or works of art.
8. Consider applying typography to your composition, inserting popular or favorite quotes or special messages into your final image.
Once you’ve got the basic blending done, Picsart offers a full spectrum of filters and effects that will further enhance your double exposure image. As always, the sky’s the limit once you’ve entered into the creative zone. It’s amazing how much we can do now with just a phone and a little imagination.
So now that you’ve mastered the double exposure technique, you can create endless combinations that will infuse your social media feed with a little whimsy! We can’t wait to see what you come up with!
Create at the Speed of Culture
Picsart is a full ecosystem of free-to-use content, powerful tools, and creator inspiration. With a billion downloads and more than 150 million monthly active creators, Picsart is the world’s largest creative platform. Picsart has collaborated with major artists and brands like BLACKPINK, the Jonas Brothers, Lizzo, Sanrio: Hello Kitty, I am a Voter, Bebe Rexha, Maroon 5, One Direction, Warner Bros. Entertainment, iHeartMedia, Condé Nast, and more. Download the app or start editing on web today to enhance your photos and videos with thousands of quick and easy editing tools, trendy filters, fun stickers, and brilliant backgrounds. Unleash your creativity and upgrade to Gold for premium perks!


