Have you ever asked yourself how others are making those perfectly curated Instagram stories? You know the ones: the slides with nice fonts, minimalist collages, and a coherent color scheme. The answer is that they are using an external app.
While social media platforms allow you to do a bit of light editing and select from a handful of fonts for texts, you have to use a bigger toolbox to get those professional-looking posts.
Social media’s in-app fonts might work well for a quick post, but what about when you want to make something more elaborate? Whether your wedding photos, an ad for your company, or a compilation of snaps from your dream vacation, you can make special posts even better by adding the perfect text.
Adding text to a post is one of the simplest yet most impactful edits you can make. Before we jump into the “how-to,” let’s look at the “why” and “what.”
First, use text to make a statement. Give viewers a quick caption that cues them into the content of the photo.
Then, make your text look good. Use fonts and colors that contrast well with your background and play around with the size of the lettering, using large fonts for a poster-like look and smaller fonts for detailed descriptions.
The Basics
No matter what kind of post you’re making, start with these steps. Then, we’ll get into some fun ways to use texts on different kinds of content.
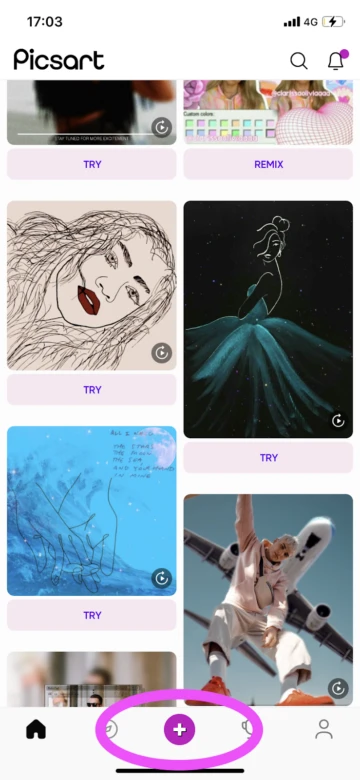
Open the Picsart mobile application and click on the purple plus sign at the bottom of the screen to start a new project. Your photo library will appear and you can select the photo you wish to work with.
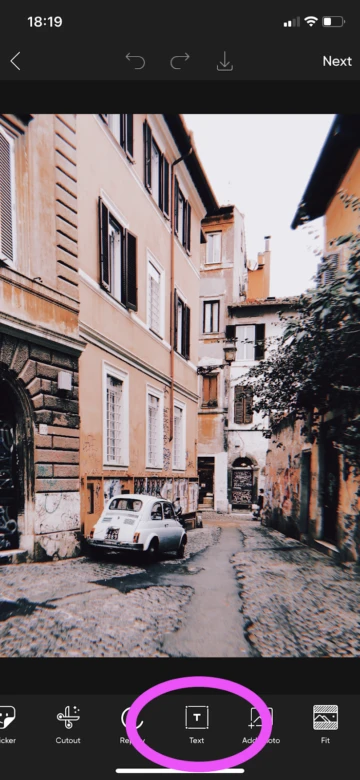
2. Once you’ve selected your photo, scroll to the right on the menu at the bottom of the screen until you find the “Text” icon and click on it.
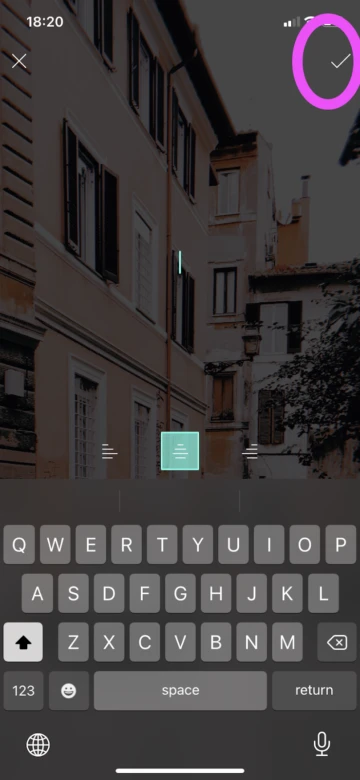
3. A cursor will appear on your screen and you can start typing. Don’t worry about the fact that the cursor is in the middle of your photo. You will be able to move and resize your text in the next steps. Once you’ve finished writing, click the check symbol in the upper right-hand corner of the screen.
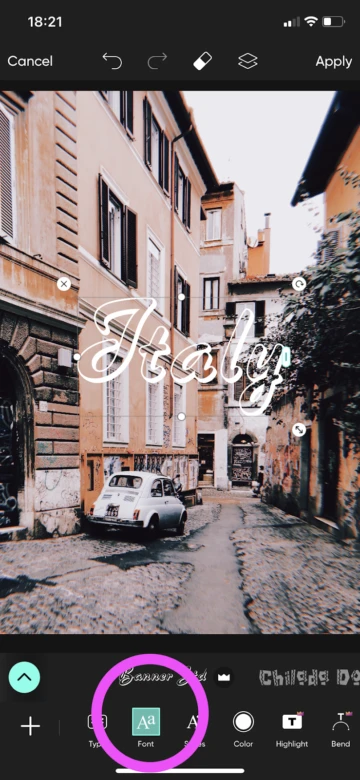
4. Now, decide on your font. This option will automatically be highlighted, so all you have to do is scroll to the right in the menu at the bottom of the screen and try out different options.
5. Resize your text as needed by using your fingers to drag at the corners of the text box.
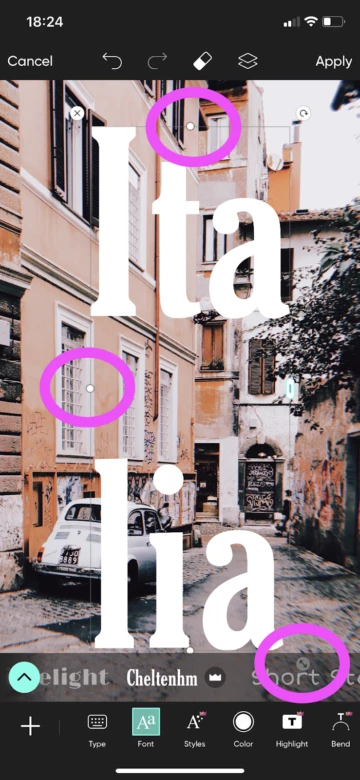
Go Bold
Now, it’s time to take our creativity to the next level with some of the more advanced tools provided. Let’s start with a bold travel poster look.
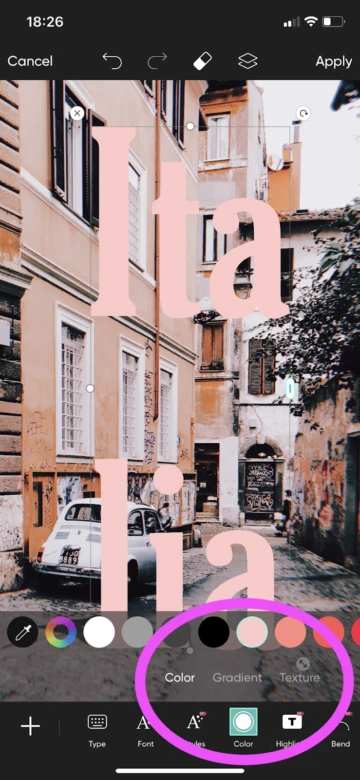
6. Having followed steps 1-5, select “Color” from the menu at the bottom of the screen. You can choose between solids, gradients, and textures. For this particular look, we recommend solid colors that won’t look too busy against the photographic background.
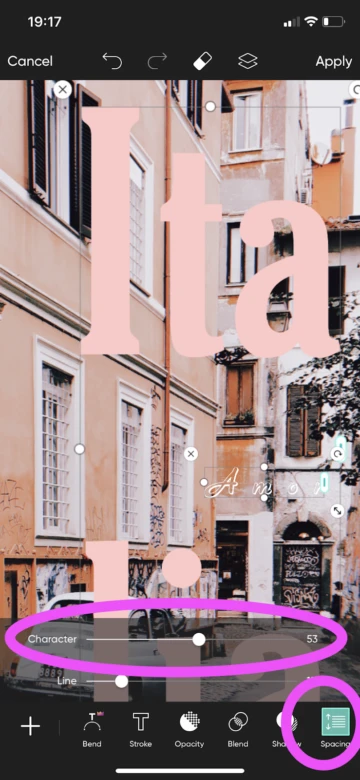
7. Aim for good balance. If your text, even if large, isn’t filling the canvas well, try changing the spacing on the letters. Choose the “Spacing” option from the toolbar at the bottom of the screen and use the character slider to put some air between your letters.
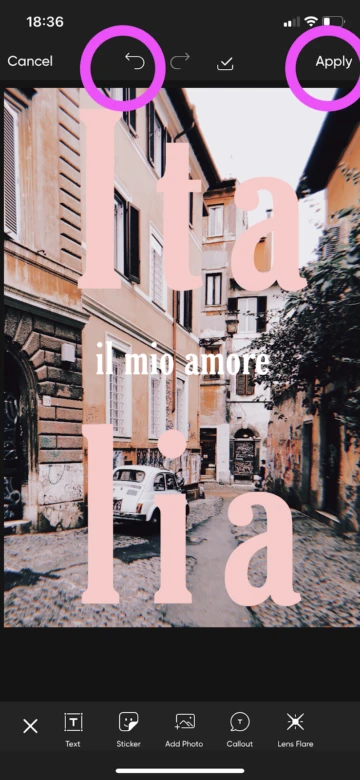
8. When you’re finished with one text, click “Apply” in the upper right-hand corner. You won’t be able to edit this particular text box afterward, so be sure you’re ready. That said, you can always click the undo arrow at the top of your screen to erase your last edit. You can add as many text boxes as you want, so if you have more to say, do it now. If you’re finished, jump down to step 13 for tips on saving your image.
Sell It
Get a more professional look for your business posts by adding text in our app. Having a sale? Opening a new store? Make your announcement in style.
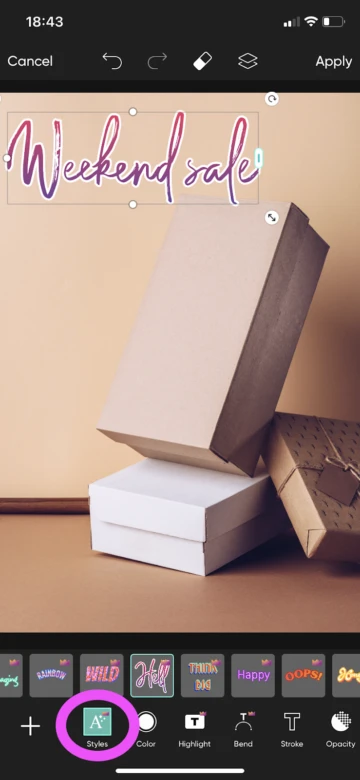
9. Having followed steps 1-5, select “Color” from the menu at the bottom of the screen. We recommend solid colors for a more refined look and gradients if you want to give off a funkier vibe. Just remember to maintain good contrast with your background. If you need some inspiration, you can try out different text effects by clicking on the “Styles” icon and playing with the preset options there.
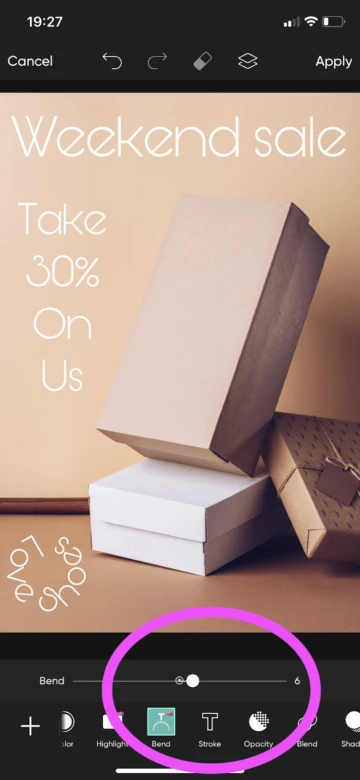
10. Explore the bend tool to curve your text around important parts of your image. Use the slider to increase or decrease the curve of the letters.
Virtual Album
Some pictures are simply more important than others. When immortalizing your big day on social media, add your message in the perfect font and take your post to the next level.
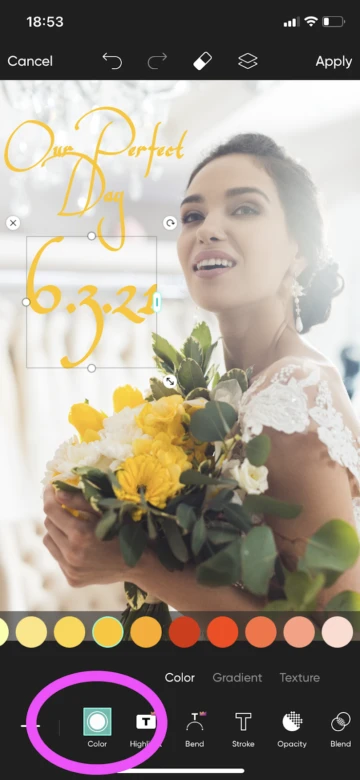
11. Having followed steps 1-5, change the hue of your letters using the “color” tool. For these types of posts, stick to neutrals or colors that can be found elsewhere in the composition.
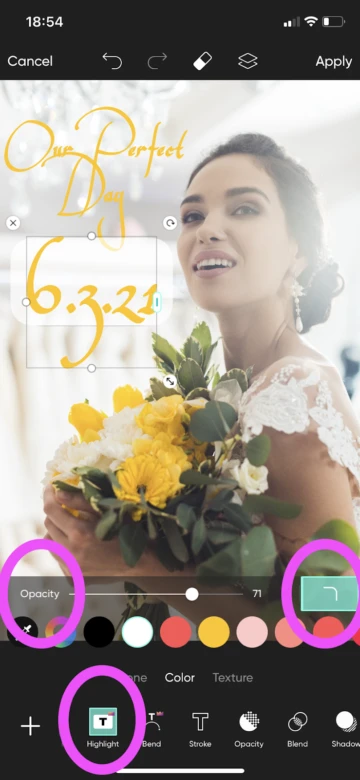
12. If you are having trouble getting your text to stand out on your background, use the “Highlight” tool. You can change the color of the letter-backing or even make it a texture or gradient. Use the opacity slider to adjust the transparency. Dropping the opacity down can help the letter-backing blend into your photo. Finally, choose from rounded or squared highlight corners by clicking on the icon containing a curved line on the right-hand side of the toolbar.
Social-Media Ready
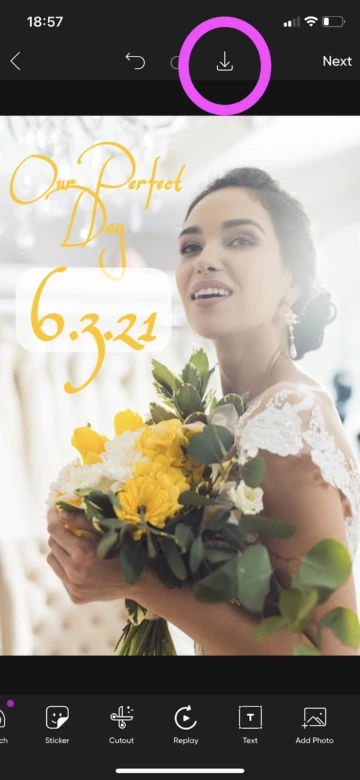
13. When your project is finished, export it easily by clicking on the download arrow at the top of the screen. When you do, the image will be saved to your phone.
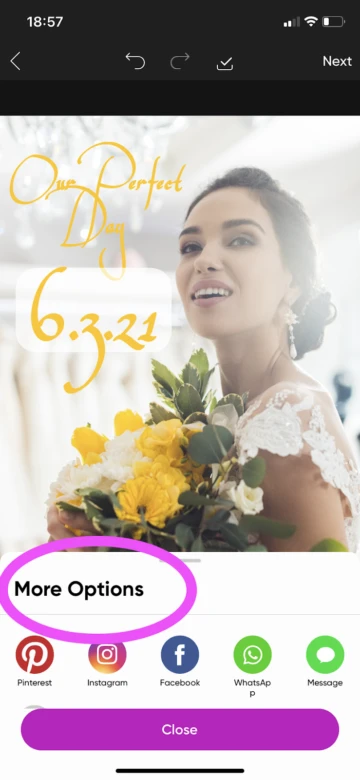
14. You will also be given more options at the bottom of the screen, making it easy to quickly post to certain apps.
Create at the Speed of Culture
Picsart is a full ecosystem of free-to-use content, powerful tools, and creator inspiration. With a billion downloads and more than 150 million monthly active creators, Picsart isn’t just the world’s largest creative platform; we’re also the fastest growing. Picsart has collaborated with major artists and brands like BLACKPINK, the Jonas Brothers, Lizzo, Sanrio: Hello Kitty, I am a Voter, Bebe Rexha, Maroon 5, One Direction, Warner Bros. Entertainment, iHeartMedia, Condé Nast, and more. Download the app or start editing on web today to enhance your photos and videos with thousands of quick and easy editing tools, trendy filters, fun stickers, and brilliant backgrounds. Unleash your creativity and upgrade to Gold for premium perks!


