
The good thing about newer cameras and cellphones is that they are proficient at taking automatic photos. So, if you don’t want to, you don’t have to change the aperture or shutter speed or even focus before taking the perfect shot. You can just let the camera automate all of that work for you.
Of course, if you want to have more control over an image, you can manage these settings yourself. Even so, modern cameras have a bit less room for error than their predecessors. For one thing, you don’t have to wait to get your film developed to see how your shots turned out. Plus, shutters work rapidly, allowing you to capture high-speed scenes –so long as you have lots of light – without creating a completely blurred image.
Automatic settings will likely capture motion in a way that favors the subjects. That is, the subjects will look sharp, even if they are moving quickly. Perhaps you’re at a sporting event, trying to capture the speed of the athletes. For these conditions, either you or your camera will likely opt for a high shutter speed if you’re using those automatic settings.
We’d venture to guess there is also a lot of daylight coming into the image. That’s the perfect recipe for a high-quality, sharp image, but it won’t have that blurred effect that implies the athletes’ speed. You can purposefully take a blurry picture by setting a slower shutter speed if you’re working manually. Still, the blurring may not be as targeted as you’d like, and the photo may look shaky overall.
So, how can you get the best of both worlds? In this tutorial, we’ll show you how to blur a photo using our “motion blur” editor. You may be asking: what exactly is motion blur? It’s the effect of those long streaky lines that trail your subject, implying speed. For example, you can use this feature to demonstrate how fast a car, bike, or runner is going. You can also choose where to place the motion blur effect on your photos, which means it doesn’t have to be a wholesale change. You can blur just the background of your image, leaving your subject sharp.
Finally, you have blur shape options, as well. If you prefer a radial blur – which makes your subject look like it came blasting out of a cannon – you can achieve this effect as easily and quickly as you would the horizontal streaks.
How to Show Motion in Your Everyday Shots
Whether you’ve been taking photos of your friends mastering skateboard tricks or your dog running around the yard, you can add motion blur to these photos with simple editing tools, transmitting the speed of the scene to your viewers.
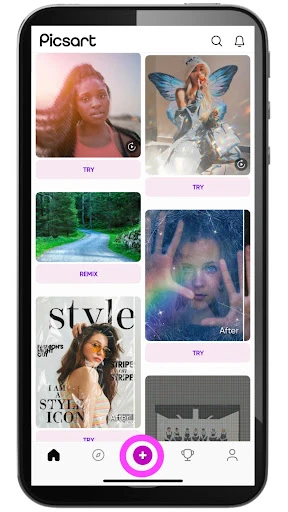
- Open the Picsart mobile app and click on the purple plus sign at the bottom of the screen to start a new project. Your photo library will appear. Choose the photo to which you’d like to apply the motion blur effect.
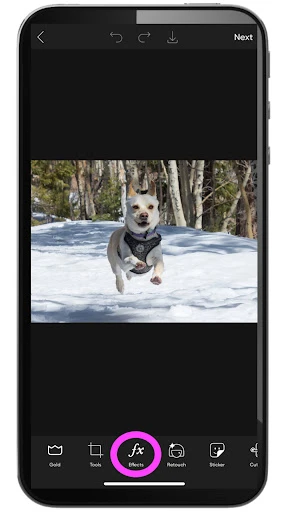
2. On the editing screen, select “FX” from the menu below your image to bring up our filters library.
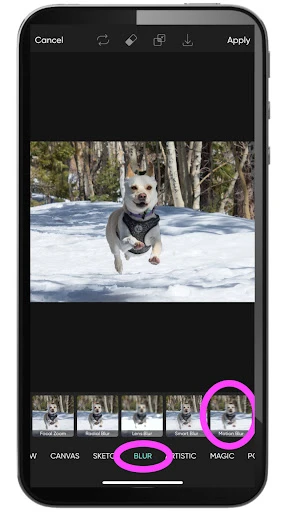
3. More than an effect, per se, “Motion Blur” is a filter, one that will stretch your photo into long streaks or concentric circles. We’ll start with the classic “Motion Blur” filter. First, click on the “Blur” category on the bottom of the screen to narrow down the filter options, and then scroll to the right until you reach “Motion Blur.” Tap on it to apply it to your photo.
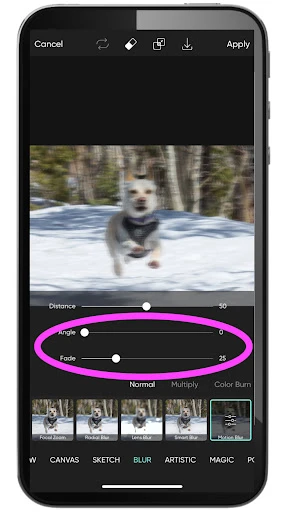
4. Now, you can change the direction and intensity of the motion effect by tapping on the filter icon again, where you should now see miniature sliders. Doing so will bring up the “Distance,” “Angle,” and “Fade” tools. We recommend starting with the “Fade” slider, which will make the motion filter more or less obvious. When you amp up the effect, you will be able to see the movement lines more clearly, which will help you decide if the angle of those lines is correct. Move over to the “Angle” tool and shift the slider around until the lines look correct – that is, until they look like they could be coming off of your subject. When you’re pleased with the effect, jump down to Step 6 to learn how to limit the filter to certain areas of the photo, leaving other parts in focus.
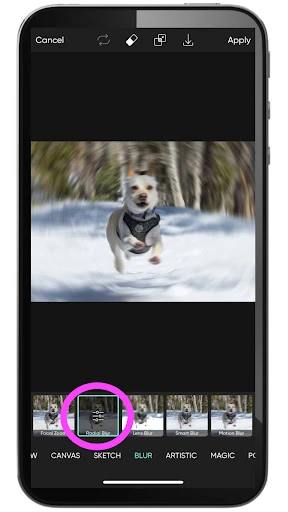
5. Now, let’s explore the “Radial Blur” effect. In this particular image, where the dog is right in the center, these concentric circles will have the “shot-out-a-cannon” effect described above. Apply the “Radial Blur” effect just as you did with the “Motion Blur” by simply tapping on the filter. Then, make any changes to the intensity by pulling up the adjustment sliders, which, in this case, include only one option: “Blur.” As you could likely guess, the “Radial Blur” effect will become more intense when you move the slider upward.
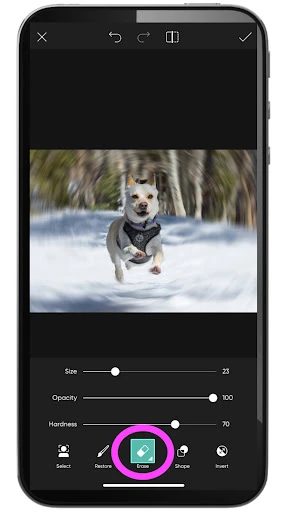
6. Now, it’s time to clean up your subject. The blur filter may look perfect on the background, but it has the side effect of making the subject – in this case, the dog – also look blurred. The solution is to erase the effect, but just in the area of the photo where the subject is. You can do this by clicking on the eraser icon above your image and slowly and carefully dragging your finger across the desired area. If the eraser seems too big, you can change its size by clicking on the small white arrow in the corner of the eraser icon, now at the bottom of the screen. Move the “Size” slider down to decrease the eraser width for more precision.
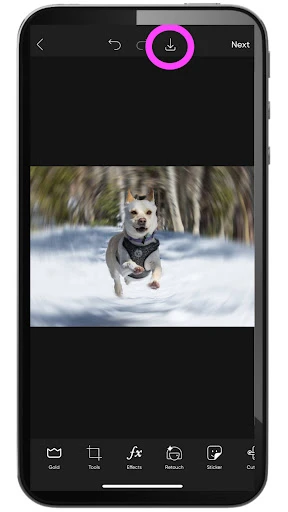
7. When you’ve finished erasing the areas where you wish to remove the effect, save your work. You can download your project or share it by clicking on the downward arrow above your photo.
Create at the Speed of Culture
Picsart is a full ecosystem of free-to-use content, powerful tools, and creator inspiration. With a billion downloads and more than 150 million monthly active creators, Picsart is the world’s largest creative platform. Picsart has collaborated with major artists and brands like BLACKPINK, the Jonas Brothers, Lizzo, Sanrio: Hello Kitty, I am a Voter, Bebe Rexha, Maroon 5, One Direction, Warner Bros. Entertainment, iHeartMedia, Condé Nast, and more. Download the app or start editing on web today to enhance your photos and videos with thousands of quick and easy editing tools, trendy filters, fun stickers, and brilliant backgrounds. Unleash your creativity and upgrade to Gold for premium perks!


