Shadows can add a lot of drama to a photo, but what can you do when it’s the wrong kind of drama? When we say “wrong,” we’re referring to underexposed pictures that are obscured all around and images that have an unwanted shadow like that of your hand taking the photo.
In this tutorial, we’ll explore two methods of editing the lighting of a photo. You’ll learn how to adjust highlights and remove shadows from pictures. In turn, you’ll be getting an express course on how to fix harsh light and tinker with oddly-placed shadows on faces. Think of this tutorial as your quick-and-dirty guide to controlling shadows. The methodologies for removing and changing the intensity of shadows are completely different, but the general idea is the same: how to edit shadows into perfection.
Disappearing Act: How to Remove Shadows from Pictures
So, you have an undesirable shadow in your image. Perhaps a bystander wandered close to the edge of your shot or you accidentally captured your own shadow in the image. Now what? In order to remove this dark patch, we’ll work with the “Clone” tool to cover up the unwanted shadow with other colors from your composition for a smooth finish. When you’re finished, no one will ever know that a pesky shadow had been in the photo.
1.Open the Picsart mobile app and click on the purple plus sign at the bottom on the screen to start a new project. Your photo library will appear. Choose the photo containing the shadow you wish to remove.

2. Now, click on “Tools” in the menu at the bottom of the screen and, from the pop-up menu, select “Clone.”
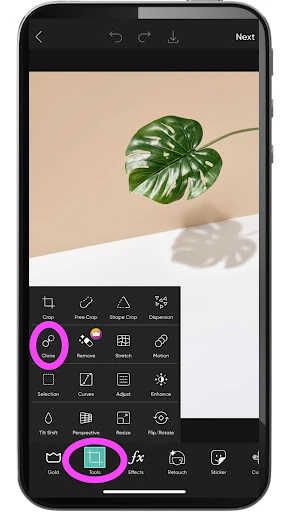
3. Now, get familiar with the cloning tool. If it’s your first time using it, a tutorial will pop up with some helpful tips. Essentially, there are three parts to the tool: the pointer, the brush, and the eraser. The pointer copies whatever part of the photo it’s focused on. The brush paints that copied material over other parts of the photo. The eraser works much as you may expect; you can drag it over your last stroke to undo it.
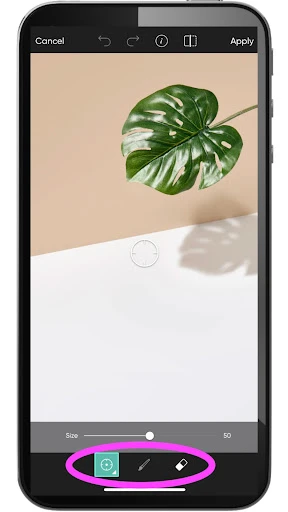
4. Let’s begin with the pointer tool. Depending on how precise you want your work to be, you can increase or decrease the size of the pointer. Just click on the little white arrow in the corner of the icon to bring up the size slider. Hint: this is how you open all the sliders on each different tool. If you want more precision, opt for a smaller-sized pointer. Then, jump over to the settings for the brush tool. Make sure that the size setting for the brush is the same as that of the pointer. These two tools work in tandem. As the brush moves, the pointer moves, literally in parallel motion. The pointer grabs colors from the picture, and the brush takes those colors and places them elsewhere.The last setting you’ll want to check is that of the brush’s “Opacity.” Set it to 100 to make sure you get complete coverage. Otherwise, your strokes will look transparent and not completely cover up the shadow you want to hide.
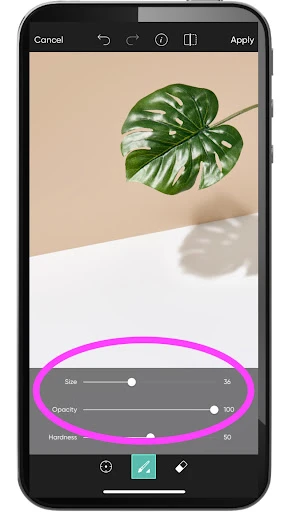
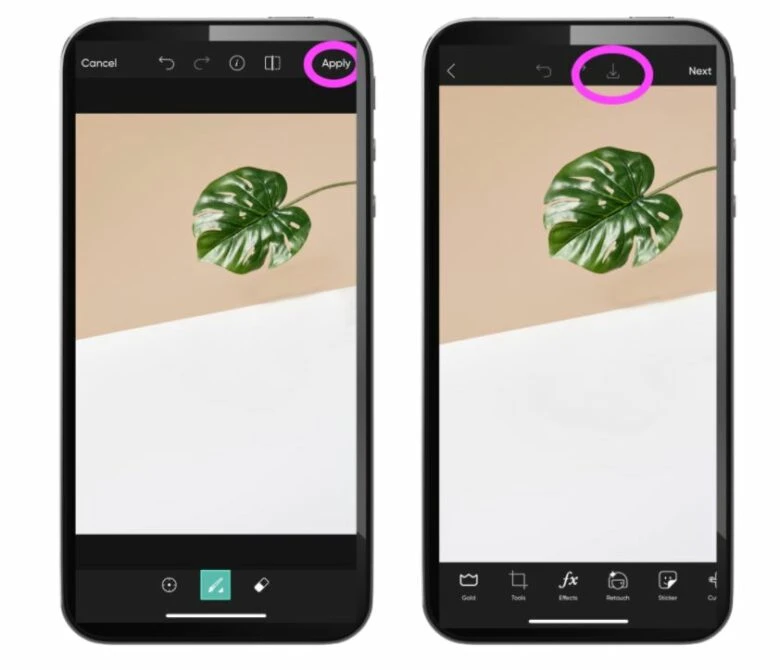
- Select the pointer tool from the menu below the photo and place it on the part of the photo you want to copy. In this case, since we’re trying to cover up the shadow on the white floor, we’ll want to select another white area of the photo. Essentially, you will be superimposing this hue onto the shadow, covering it up. Then, select the brush tool and drag your finger across the shadow, brushing from side to side. Watch how the pointer moves with you, copying the background colors onto the dark spot you’re brushing away.
Pro Tip: If you accidentally copy an unwanted color with the pointer–in this case, let’s say some of the green of the plant–use the back button to undo your last stroke. Then move the pointer safely out of the territory of that unwanted color so that the tool doesn’t accidentally grab it again.
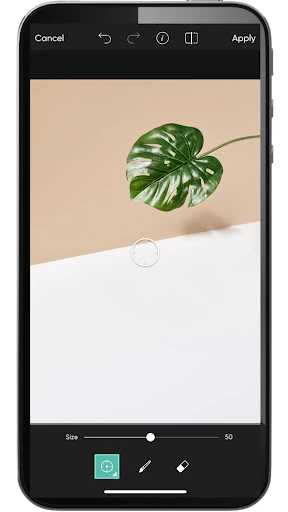
6. When you’re done removing the shadow, click “Apply” in the upper right-hand corner of the screen. Then, click on the downward arrow at the top of the following screen to save the image to your phone.
Bringing Your Photo Out of the Dark: How to Fix Shadows on Faces and More
In this section of the tutorial, we’ll be looking at how to brighten highlights in your photo. Editing can sometimes reduce the overall quality of a photo, adding “noise,” a.k.a graininess. So, we’ll show you how to use a series of tools to make small tweaks to the photo’s lighting rather than one tool to make a big shift. The result will be a smoother looking edited photo.
- Open the Picsart mobile app and click on the purple plus sign at the bottom on the screen to start a new project. Your photo library will appear. Choose the photo you wish to edit.

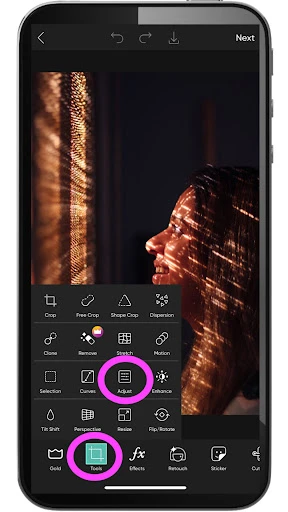
2. Now, click on “Tools” in the menu at the bottom of the screen and, from the pop-up menu, select “Adjust.”
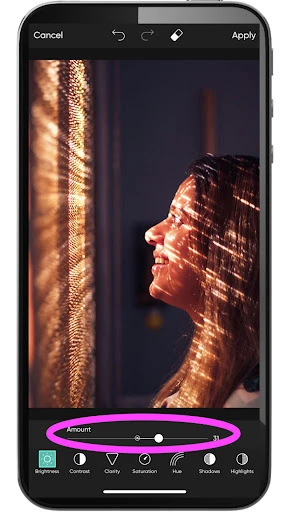
3. Start with the “Brightness” tool, the obvious choice. Move the slider to the right to bring more light into the photo, but don’t overdo it. Remember that if you go too far with any one tool, the picture will start to look grainy fast.
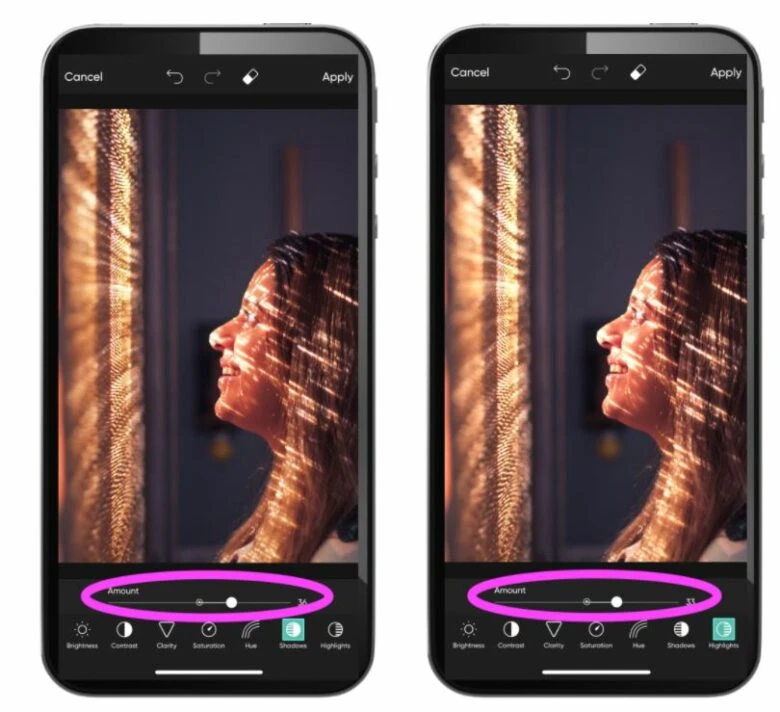
4. Now, move over to the “Shadows” and “Highlights” tools, and follow similar logic. Lighten the shadows by moving up on this respective slider, and then amp up the highlights, too. Just be sure to do both in moderation.
5. Finally, nudge your edits by using the “Contrast” tool to make your photo look softer and dreamier or the “Brightness” tool again to add some depth back into the photo. With the “Contrast” tool, drag the slider downward–that is, to the left–to create an airy effect. With the “Brightness” tool, drag the slider up for a deepening effect. As always, when you’ve finished making changes, click on “Apply” in the upper right-hand corner of the screen to get them to stick.
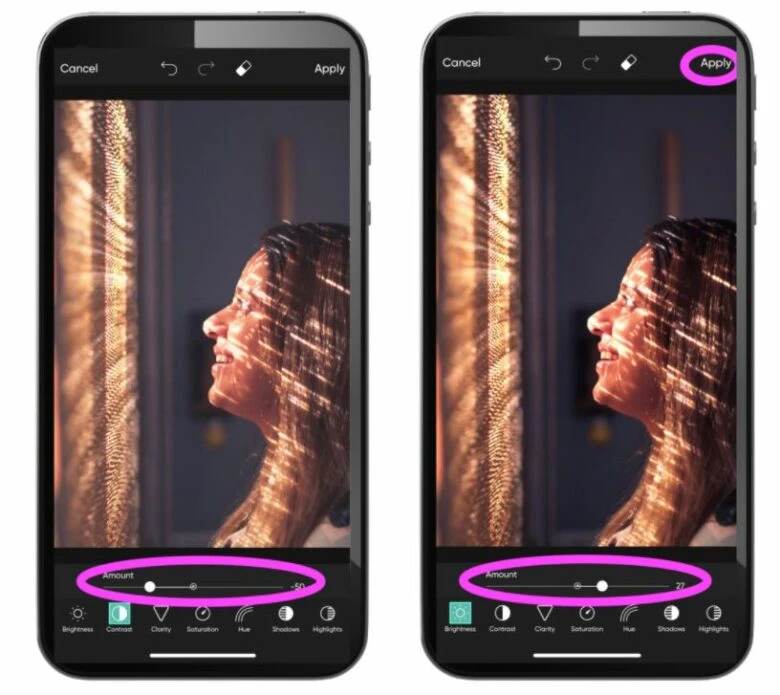
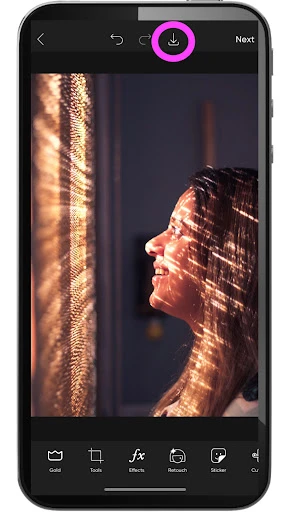
6. Now, you’re ready to export your work. Click on the downward arrow above your photo to save your perfectly-edited image to your phone or share it with the world in a Facebook post or Instagram story.
Create at the Speed of Culture
Picsart is a full ecosystem of free-to-use content, powerful tools, and creator inspiration. With a billion downloads and more than 150 million monthly active creators, Picsart is the world’s largest creative platform. Picsart has collaborated with major artists and brands like BLACKPINK, the Jonas Brothers, Lizzo, Sanrio: Hello Kitty, I am a Voter, Bebe Rexha, Maroon 5, One Direction, Warner Bros. Entertainment, iHeartMedia, Condé Nast, and more. Download the app or start editing on web today to enhance your photos and videos with thousands of quick and easy editing tools, trendy filters, fun stickers, and brilliant backgrounds. Unleash your creativity and upgrade to Gold for premium perks!


