Imagine this: you just booked a trip to your ultimate bucket list destination. Naturally, you’re going to want to capture the best pictures possible to remember your amazing adventure. But how can you get the same kinds of pictures you see on postcards? From getting the right gear to fiddling with filters to climbing steep mountains, mastering travel photography can seem overwhelming, but it doesn’t have to be. Here are the best photography tips and tricks to level up your photography game.
Travel photography tips
The best travel photos are like a time machine, freezing memories from your favorite adventures that you can look back on over the years. It can even help you inspire other people to take the leap and hop on a flight!
So, how can you capture the best shots of your upcoming trip? Whether you’re a travel photography newbie or photography pro, here are the best photography tips to amplify your pictures.
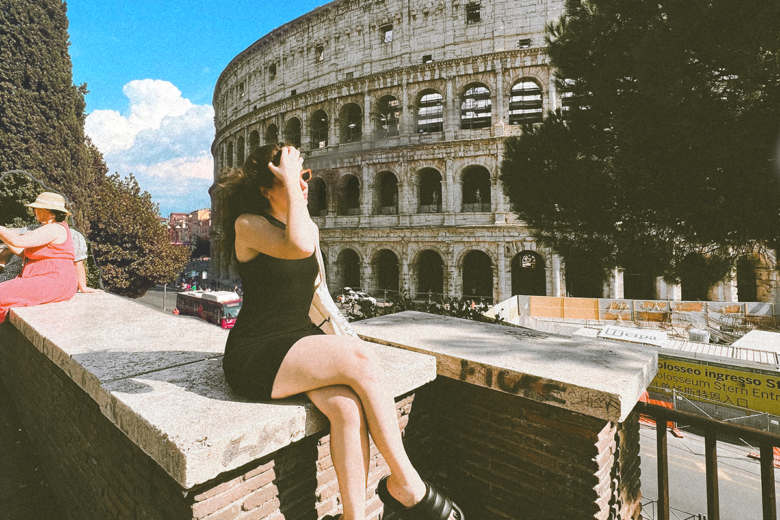
Do your homework
If you’re heading to a new place, make sure to do your homework when researching scenic spots. Not sure where to start? Try scanning Picsart for location-tagged pictures, doing some basic Google searches, or searching Pinterest to find the best places for travel photography. Take some time to read about the best conditions for visiting and plan your days accordingly.
Tap into your inner storyteller
Just like all other types of photography, travel photography is about telling a story. It’s about how different shots work together, and it doesn’t always mean that an epic shot of a snow-capped peak is the best picture. It’s about capturing the perfect moment and telling the story of where you are, whether you’re exploring a nearby city, traveling overseas, or visiting your bucket list destination.
Get to know your camera
Whether you’re shooting with a DSLR, smartphone, or something in between, you need a camera that you know how to use. If you’re buying a new camera for your trip, set aside enough time to know your camera before getting on the plane. If you’re going pro, consider investing in a wide-angle lens, telephoto lens, and polarizing filter for harsh sunlight. And of course, a few extra memory cards and batteries are essential.
Consider your composition
It might be tempting to snap pictures with your smartphone and call it a day, but trust us, composition matters. To do travel photography like the pros, you need to push past simple point-and-shoot pictures and search for amazing compositions. To upgrade your travel photos, look for interesting focal points and follow the rule of thirds.
Don’t forget about travel photo editing
After you’ve captured some scenic shots, it’s time to upgrade your pictures with an online photo editor. Travel photography typically features bold, saturated colors and little grain, so the Adjust tool will be your best friend. From there, you can tweak the saturation, brightness, and clarity to enhance your pictures. Don’t be afraid to play around with different photo effects and pro-grade filters to unleash your creativity.
5 best colors to wear for travel photos
The best way to make your travel photos pop? Figure out what colors to wear to stand out from the crowd. Your goal is to contrast with your surroundings, so you’ll want to consider your background and choose a color on the opposite side of the color wheel.
It might sound simple, but wearing the right colors can make all the difference in your pictures. Whether you’re shooting pictures for social media or just taking some fun photos for your albums, here are the best colors to wear for travel photos.
Bright red
If you’re traveling to the tropics or lounging on the beach, skip the blue bathing suit and stand out with vibrant shades of red. Bright reds and oranges are the best colors to contrast with blue water and sandy beaches. If bright red bathing suits feel too bold, you can still achieve a subtle contrast with red shades, a sunhat, or even just a lip color.
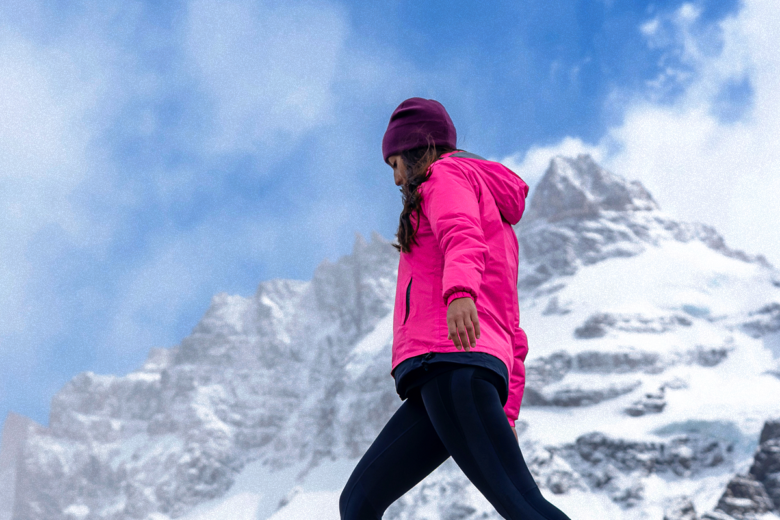
Hot pink
If you’re taking the scenic route, pink is the perfect contrast against the blue sky, green trees, and mountains. There’s usually more contrast and bolder colors in natural environments, so you should choose a bright color that covers as much of you as possible. Hot pink can help you stand out against the scenery while adding a playful and dreamy touch to your travel photos.
Magenta
If you’re going somewhere sandy or snowy, you’ll want to create a stark contrast with bold colors. To stand out against plain neutral backgrounds, take your outfit to the next level with shades of magenta, purple, and fuschia. If you want to go even bolder, try incorporating fun patterns.
Pastel yellow
If you’re heading to the city, you need a bright color that pops against every background, and that’s where pastel yellow can be your MVP. For example, in New York, you’ll see yellow taxis, so wearing yellow to coordinate can create an attention-grabbing shot. And if the weather turns grey during your vacation, you can still bring the sunshine to your travel photography with a bright outfit.
Royal blue
If you’re traveling somewhere with tons of different colors (think: street markets), amplify your photos with rich tones of blue and navy. Royal blue is a calming color that can help you pop against noisy backgrounds. If you’re unsure how to add contrast, try playing with different patterns and accessories to upgrade your outfit.
How to edit travel photos using Picsart
Once you’ve nailed down the best places for travel photography and put all of our photography tips to the test, it’s time to bring your photos to life. Every destination has a unique look, culture, history, and landscape, and editing software gives you the perfect opportunity to tell that story.
Ready to get started? Here’s how to master the art of travel photo editing with Picsart.
On the web:
1. Open the Picsart Web Editor and start a new project. Then, click Uploads to upload your favorite travel photos.
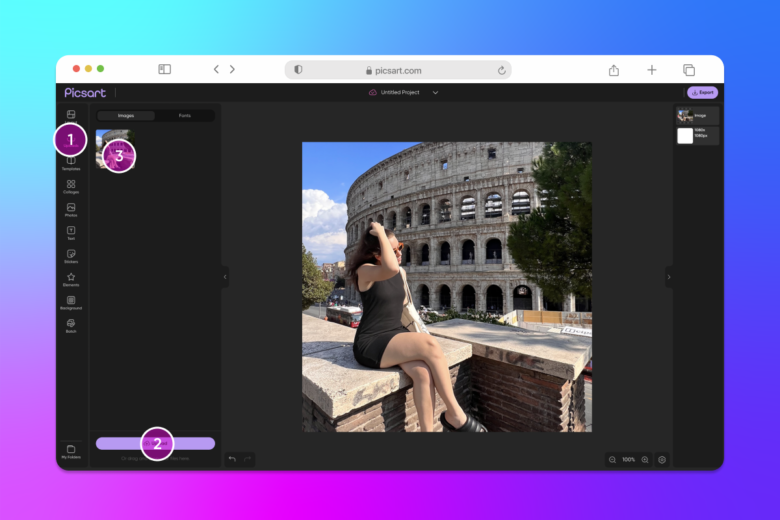
2. Next, click Effects on the top panel toolbar to upgrade your travel photography with pro-grade photo effects. You can keep it simple with subtle touch-ups, add dramatic light effects, or create dramatic black-and-white shots to bring your creative vision to life.
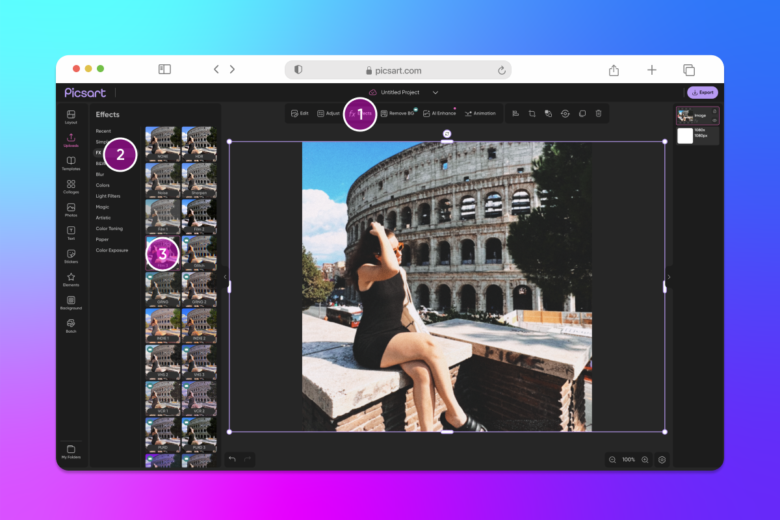
3. Click Adjust on the top panel toolbar to tweak the saturation, exposure, and other settings. If you missed the sunshine, try playing with the brightness slider to revive your picture.
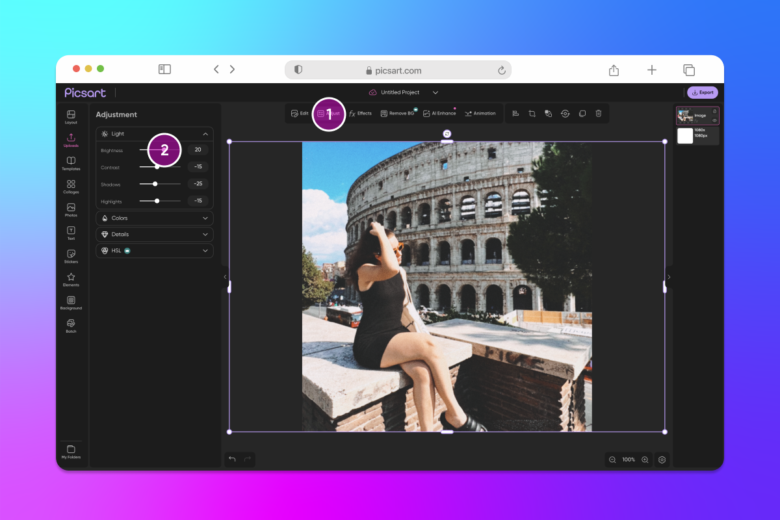
4. When you’re finished editing your pictures, click Export in the top right corner to download the image.
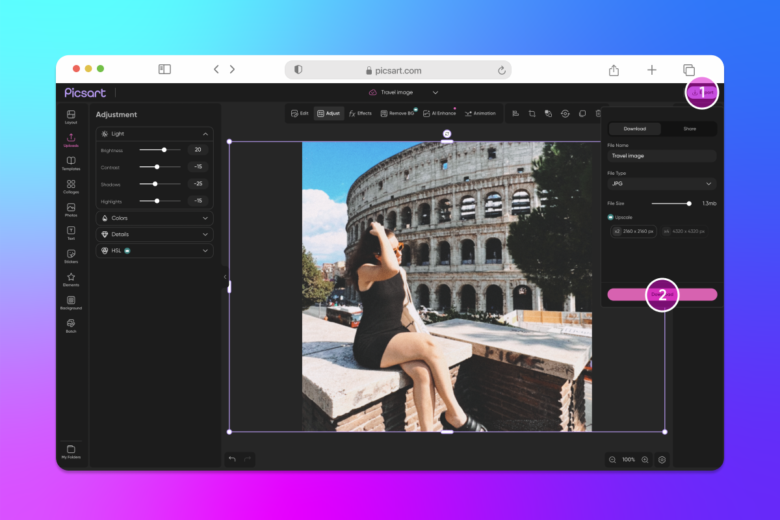
On mobile:
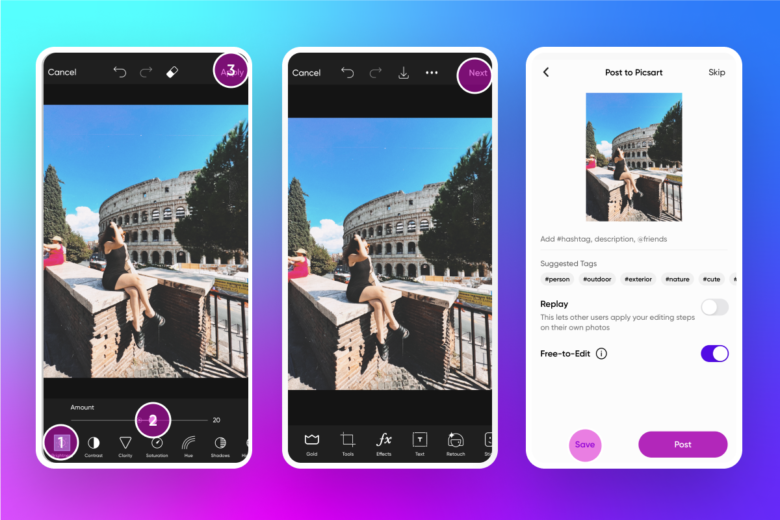
1. Open the Picsart app and tap on the plus sign (+) to start a new project. Under Photos, select All Photos to upload your travel pictures.
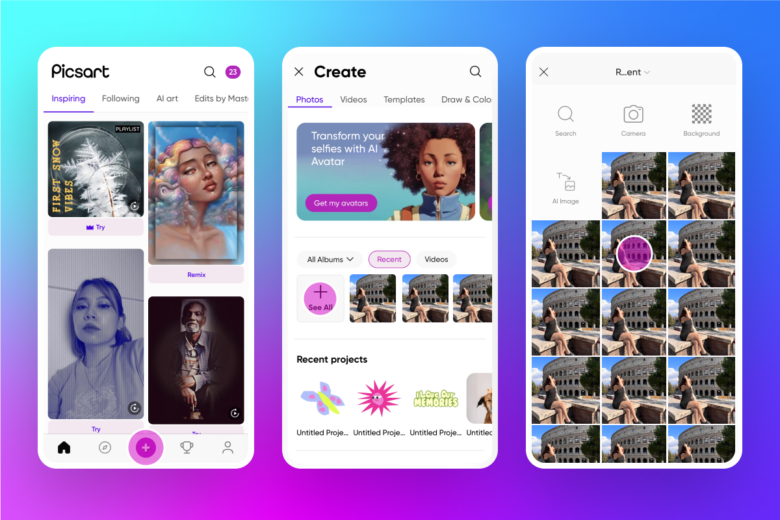
2. Then, tap Effects on the bottom panel toolbar. Try experimenting with different light and color effects to amplify your photos. You can even layer different photo effects for a unique look.
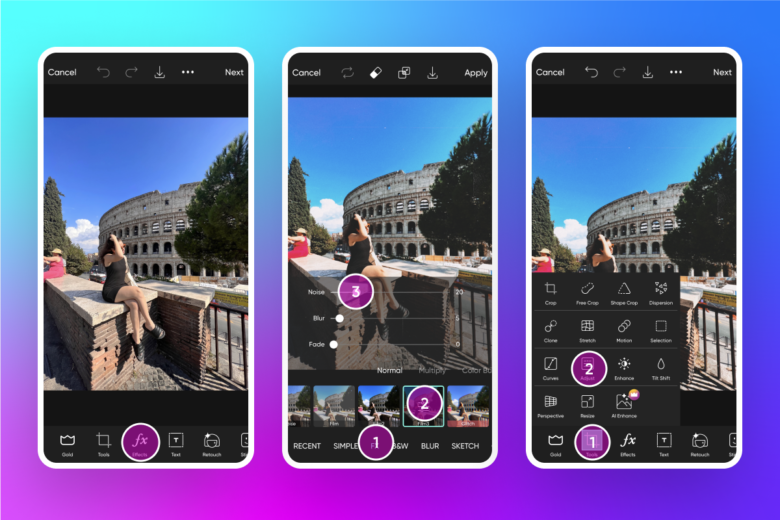
3. Tap Tools, then choose Adjust. Here, you can adjust the saturation, brightness, and other settings to edit your photos to perfection. If you were shooting on a cloudy day, try sliding the brightness slider to the right for extra light.
4. When you’re finished editing, tap Next. Next, choose Save and Share your travel photography.
Create at the Speed of Culture
Picsart is a photo and video editing platform and creative community. A top 20 most downloaded app worldwide with over 150 million monthly active users, its AI-powered tools enable creators of all levels to design, edit, draw, and share content anywhere. The platform has amassed one of the largest open-source content collections in the world, including photos, stickers, backgrounds, templates, and more. Used by consumers, marketers, content creators and businesses, Picsart tools fulfill both personal and professional design needs. Picsart has collaborated with major artists and brands like BLACKPINK, Taylor Swift, Lizzo, Ariana Grande, Warner Bros. Entertainment, iHeartMedia, Condé Nast, and more. Download the app or start editing on web today, and upgrade to Gold for premium perks!


