In the early days of Instagram, before Stories and Instagram carousel photos, you had to choose exactly the right picture to post, filter it perfectly, and hope for the best with the algorithm. Since then, this popular social media platform has evolved to offer a wider variety of post options to help users make the best content for their followers, including Reels and longer videos.
In this article, we’ll cover everything you need to know about Instagram carousel posts, including creative ways to create your own eye-catching posts with Instagram carousel templates. You’ll be increasing your engagements in no time!
What is an Instagram Carousel?
It happens to the best of us: you can’t choose just one photo to post. That’s what carousels are for. In a carousel post, you can add up to 10 photos in the classic feed style, swiping left to see each consecutive photo.
Carousels are a great post format option for both brands and personal account users. Whether you want to share a photo dump from the weekend, are doing a meme roundup, or you need to share all of the details in a news story and have a lot of text on screen, carousels are good options.

Instagram Carousels vs Single Image Posts
Not sure whether to post just one or share the whole highlight reel? Carousels are often a more engaging post format than a single image because viewers have to swipe through to see all of the photos and understand the full story you’re trying to convey. As long as your content tells a story, people tend to like flipping through multiple images. So, the next time you want to post ten photos of your dog or images of your latest product drop, don’t hold back. Just make sure the first photo in the series is eye-catching to encourage people to tap next.

What are Instagram’s Carousel Image Specifications?
Social image sizes vary by platform. And ignoring platform sizing and resolution requirements can result in stretched, warped, and incorrectly cropped photos. So, use this guide before you post for best results.
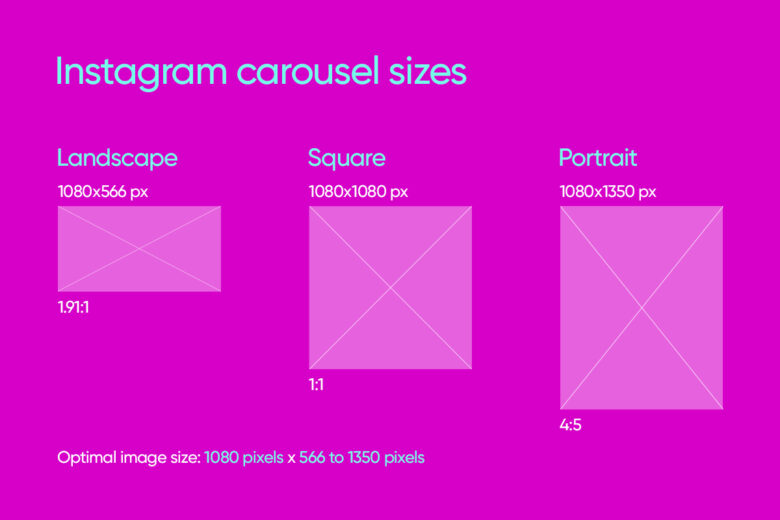
Instagram carousel sizes:
Landscape: 1080 x 566 pixels or 1.91:1 aspect ratio
Portrait: 1080 x 1350 pixels or 4:5 aspect ratio
Square: 1080 x 1080 pixels, or 1:1 aspect ratio
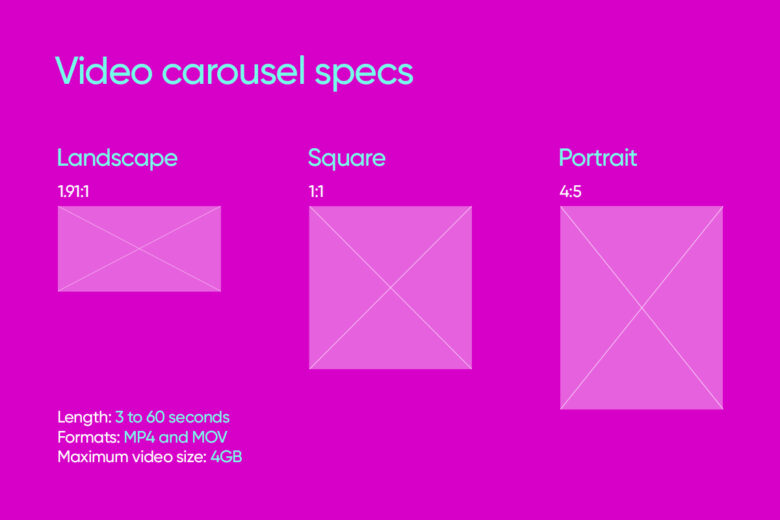
Video carousel specs:
Length: 3 to 60 seconds
Formats: MP4 and MOV
Maximum video size: 4GB
How to Make a Carousel on Instagram
Ready to make your first instagram carousel? Follow the below tutorial and you’ll be posting carousel image posts in no time.
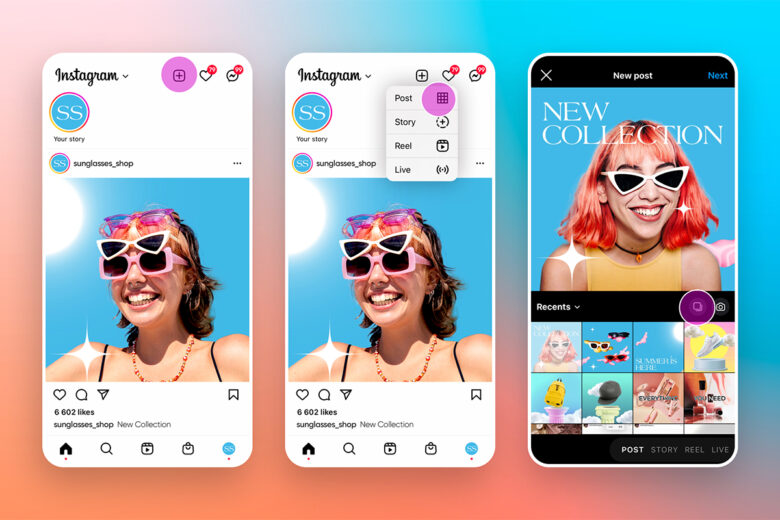
1) Open the Instagram app and click on the plus sign in the upper right-hand menu. From the drop-down menu, choose Post.
2) Now it’s time to select your images.You’ll see an icon that looks like a stack of papers. Tap on it to activate carousel image selection.
3) Now, your fotos should have circles in the upper right-hand corners that you can tap on to select which photos will go in your carousel. Start tapping on the photos you’d like to add. You can choose up to ten, and the app will count for you, denoting how many photos you’ve chosen with numbers in the circles of the corners of the selected photos. If you accidentally choose the wrong photo, tap on it again to remove it from your selection.
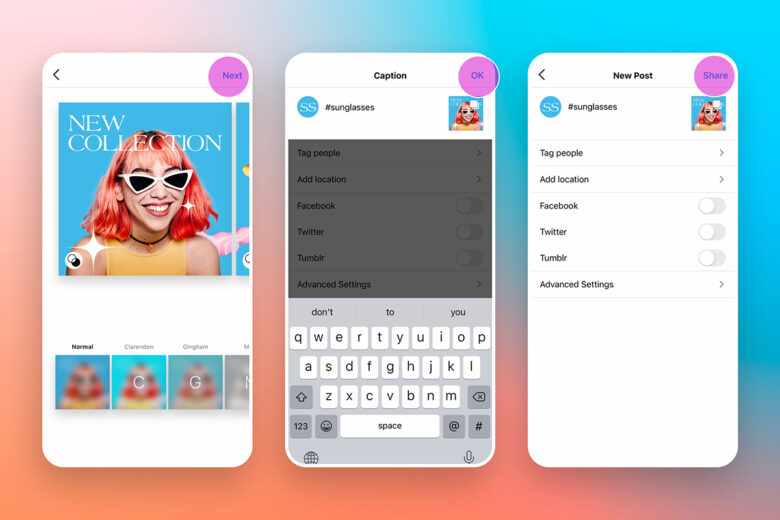
4) Once you’ve finished selecting your photos, tap on Next in the upper right-hand corner of the screen.
5) Now, do any last-minute edits to your photos by scrolling through your selection and using the menu of filters on the bottom of the screen to apply quick effects or clicking on the icon in the lower left-hand corner of your photo to access a range of editing tools. If you want to edit your photos further, we recommend using a creative platform like Picsart.
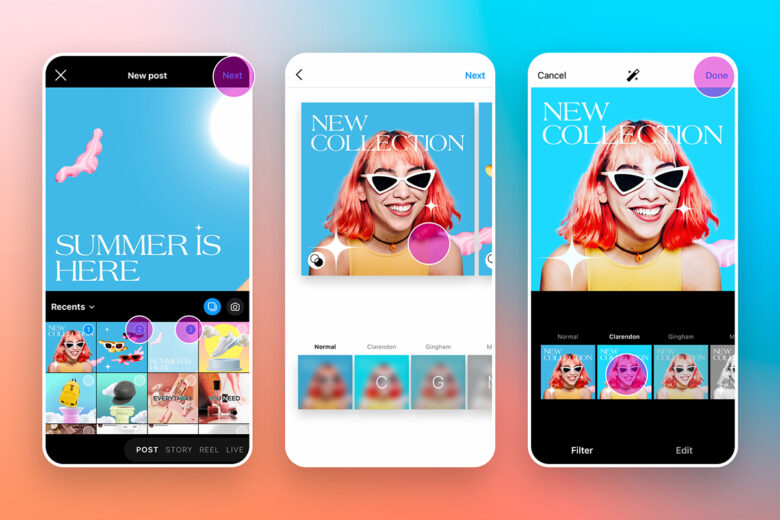
6) When you’ve finished, tap Next in the upper right-hand corner of the screen and add a caption and relevant hashtags before sharing your carousel on the app.
Ways to Use a Carousel on Instagram
The options for types of content for carousels are limitless. Whether you’re using carousels for digital marketing or to share photos from your weekend, here are a few ideas for your next post.
- Photo dump: Post several photos from a certain point in time, like a new store opening or behind the scenes of a photoshoot, or a fun weekend trip.
- Reveals: Launching a new product? Take photos of it from every angle, close up and from afar, and share it with the world.
- Before and afters: If you’re an interior designer or contractor, show your followers the amazing work you did from start to finish with a carousel post that shows the transformation of a space.
- Tell a story: Carousels provide Instagram users with a lot of visual space, so think of each photo as a new Instagram slide in which to tell a story. Whether it’s about your weekend, behind the scenes of an event, or about a movement that’s important to you – these are all ripe for carousels.
How to Create an Instagram Carousel with Picsart
Get each image publication-ready before you add it to a carousel with our easy editing tools for Instagram. You can even use our ready-made layouts as a carousel template.
On the web:
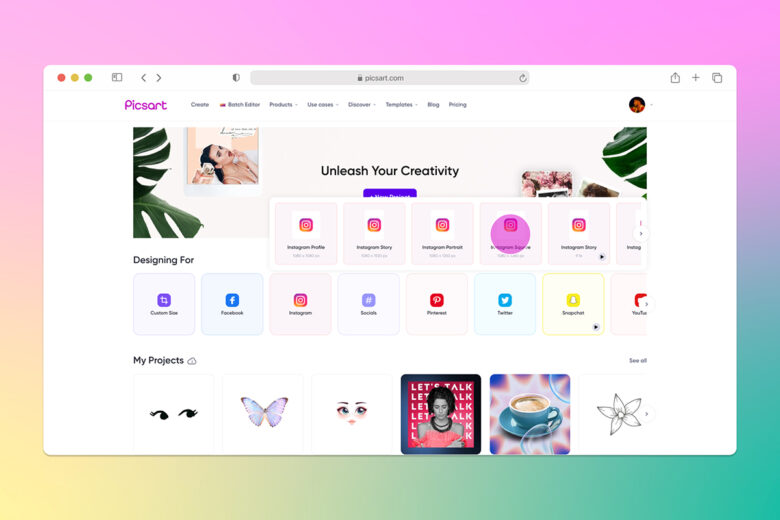
1) Open the Picsart Web Editor, and from Designing For, choose Instagram. Then from the pop-up menu, select the type of post you’d like to make. In this case, you’ll want the Instagram square size.
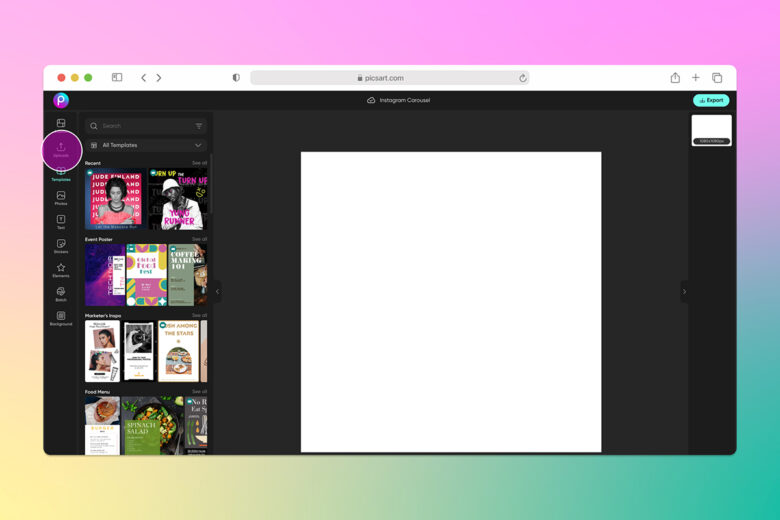
2) Now, it’s time to edit your content. Click on Upload in the left toolbar and select a photo to edit.
Use the sliders in the toolbar above the image to adjust elements like brightness, contrast, and shadows. We removed the background of our image by selecting Remove BG.
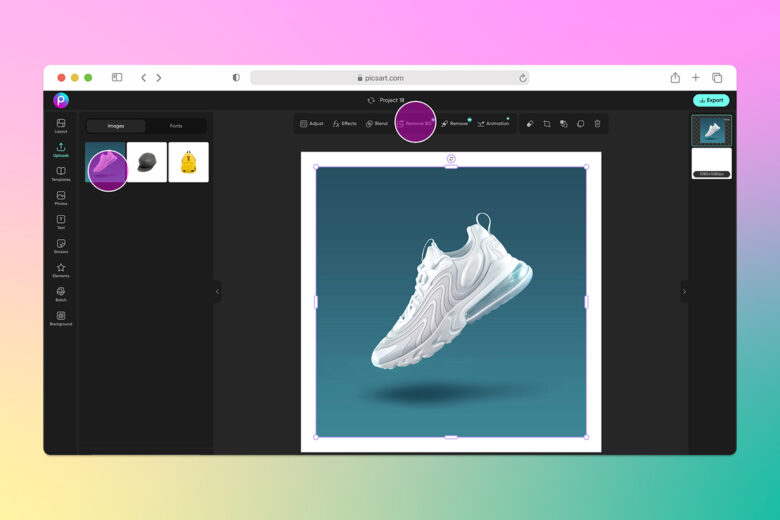
3) You can further customize your post by adding Stickers, Filters, and Text to add a call to action. Just make sure the font you select is easily legible on the smaller screen of the Instagram app. In this tutorial, we’ll go a step further and change the background to create an eye-catching Instagram carousel. Click on Background in the left toolbar and select a fun background or upload one of your choice.
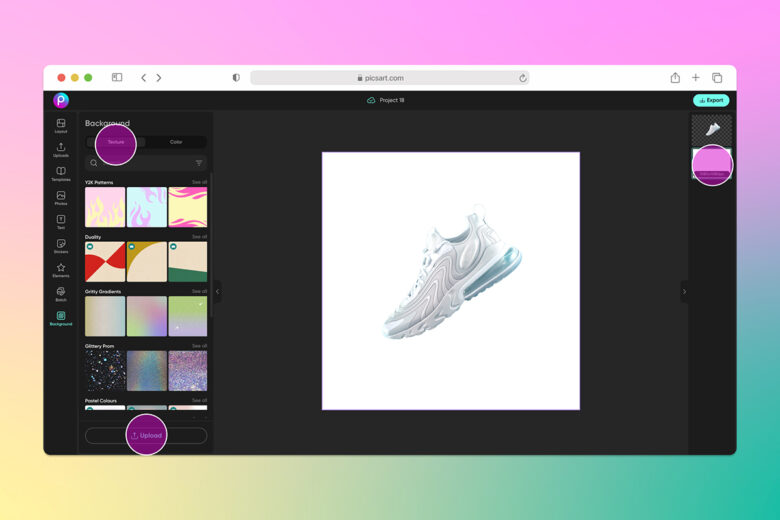
Voila – your product is now on a pedestal!
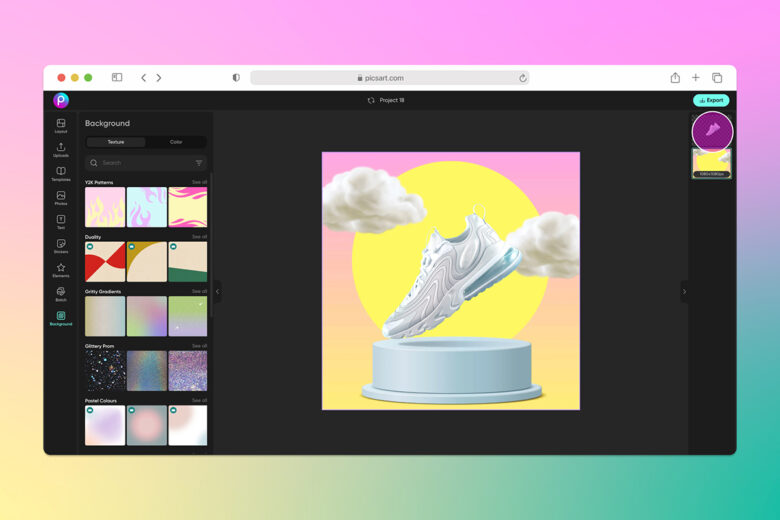
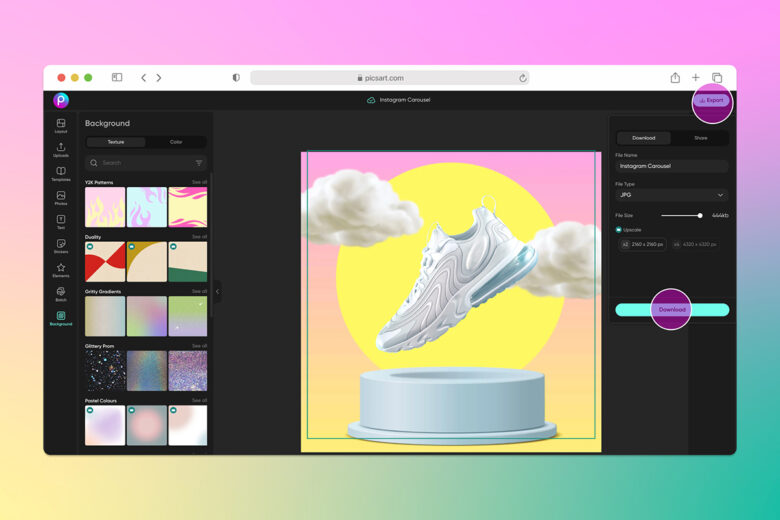
4) When you are satisfied with your edits, download your photo using the Export button in the upper right-hand corner of the screen.
On the mobile app:
1) Open the Picsart mobile app and click on the purple plus sign (+) at the bottom of the screen to start a new project.
2) In this case, we’re going to make a post to promote a new product drop, so we chose a fun background and we’ll add our product image to it in the next steps. If you want to edit a standard photo, then upload a photo from your camera roll by tapping on Photos.
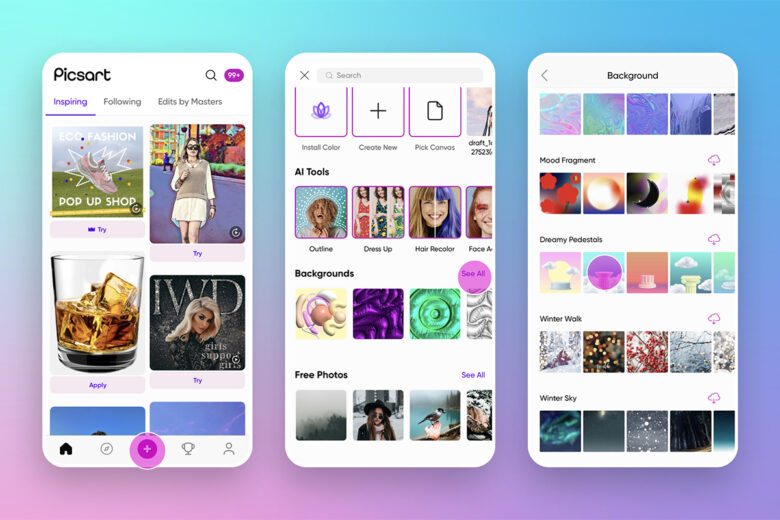
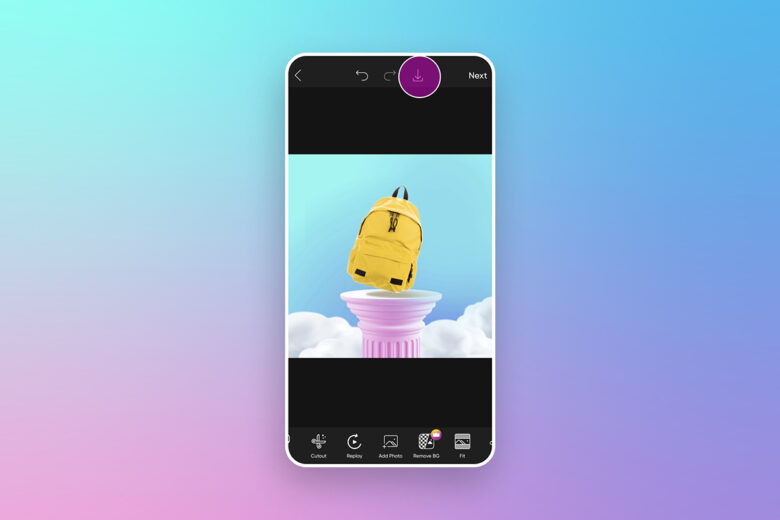
3) Tap on Add Photo and upload your product photo. Then select Remove Background and watch the old background instantly disappear, leaving only your product and the fun background you selected in Picsart. Reposition as needed and tap on Apply when done.
If you’re not editing a product photo, use this step to use the tools in the Editor toolbar to apply Effects (fx), Text, Stickers, or use the Retouch tool to smooth out wrinkles, make blemishes disappear, and relight your photo. When you’re finished, tap on Apply in the upper right-hand corner of the screen to get your changes to stick.
4) When you are satisfied with your edits, tap on the download arrow in the upper toolbar of the screen to save your image.
Create at the Speed of Culture
Picsart is a full ecosystem of free-to-use content, powerful tools, and creator inspiration. With a billion downloads and more than 150 million monthly active creators, Picsart is the world’s largest creative platform. Picsart has collaborated with major artists and brands like BLACKPINK, Taylor Swift, the Jonas Brothers, Lizzo, Ariana Grande, Jennifer Lopez, One Direction, Sanrio: Hello Kitty, Warner Bros. Entertainment, iHeartMedia, Condé Nast, and more. Download the app or start editing on web today to enhance your photos and videos with thousands of quick and easy editing tools, trendy filters, fun stickers, and brilliant backgrounds. Unleash your creativity and upgrade to Gold for premium perks!


